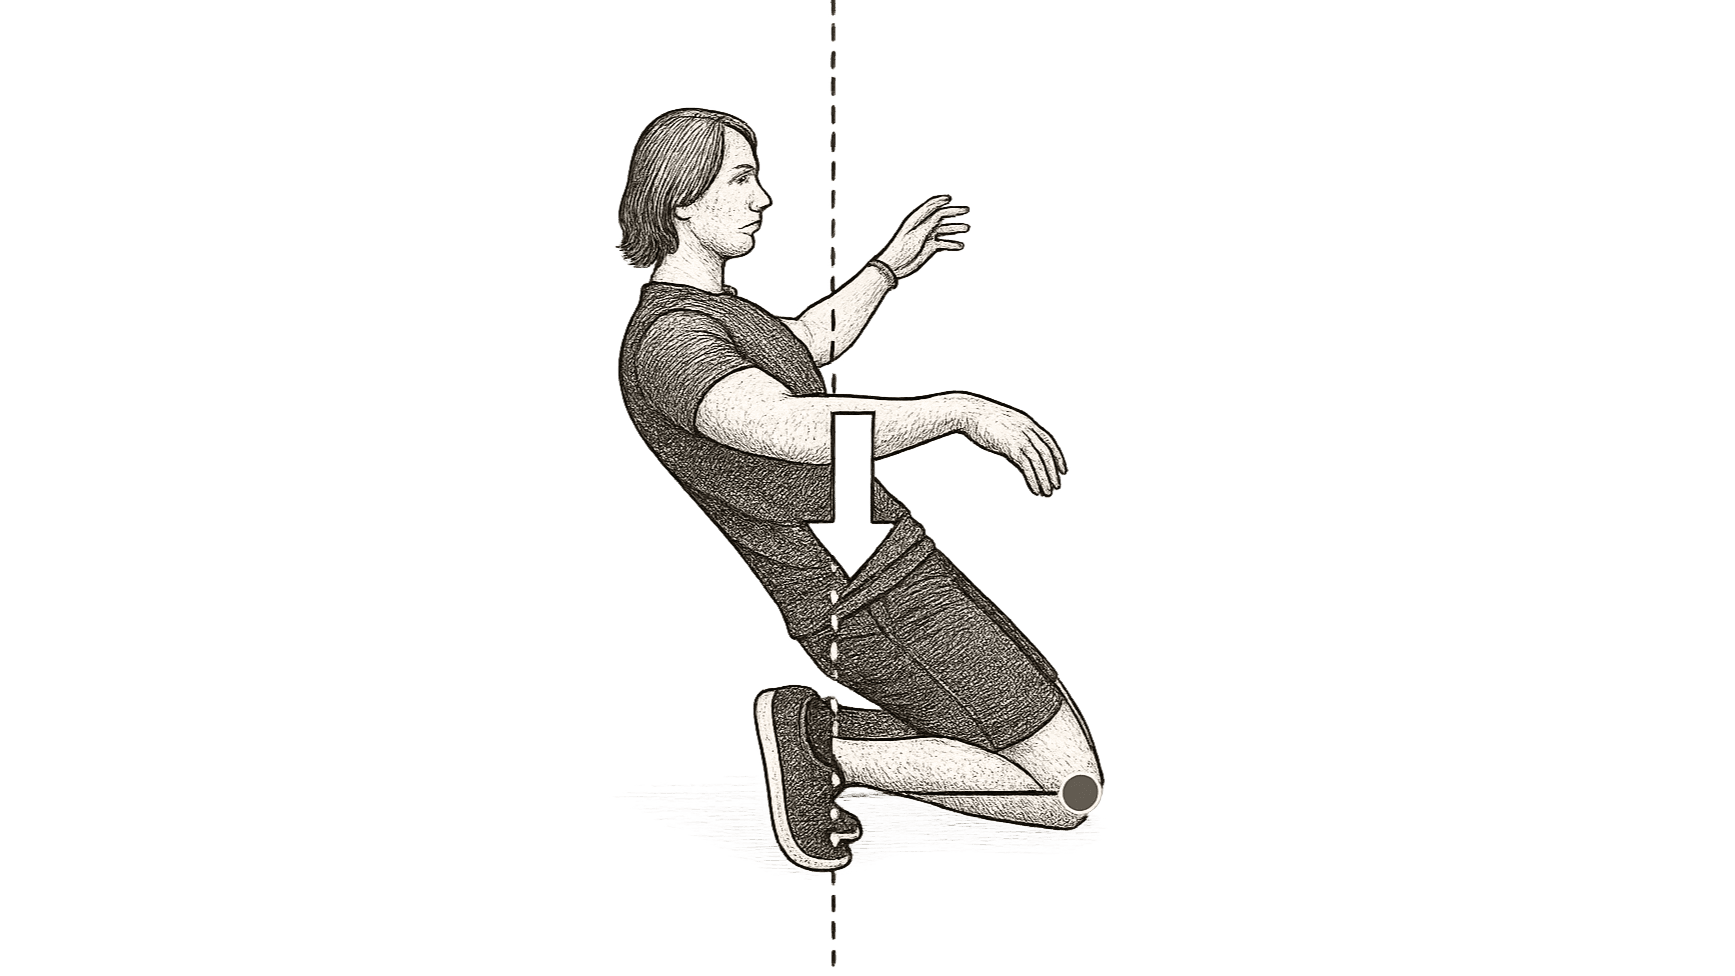
If you want to build a calisthenics training program to learn skills like planche, one arm chin up or handstand push up, but you struggle with feeling confused and overwhelmed with all the possible choices to make and don't know where to start, you’ve come to the right place.
This article is an ultimate, in-depth guide based on years of coaching experience, interviewing experts and reviewing literature. And it’s been written specifically to help people like you on the calisthenics journey.
Structure Seeker (Backstory)
If you are like me, you like things structured. Ever since I started my calisthenics journey in 2014, when I had absolutely no idea what I was doing, I've always been drawn to some sort of planning.
And sure, sometimes it was "productive procrastination", but I really believe that knowing what I was supposed to do was part of my success in sticking to it and doing the hard, uncomfortable work at the time.
At first, I was not intrinsically motivated to exercise, I did it only for the benefits it was supposed to bring. However, the process of writing down the numbers in my notebook was extremely satisfying. I felt that I was building something. I felt that my hard work was not being forgotten, but was being documented in some way (just like the training videos).
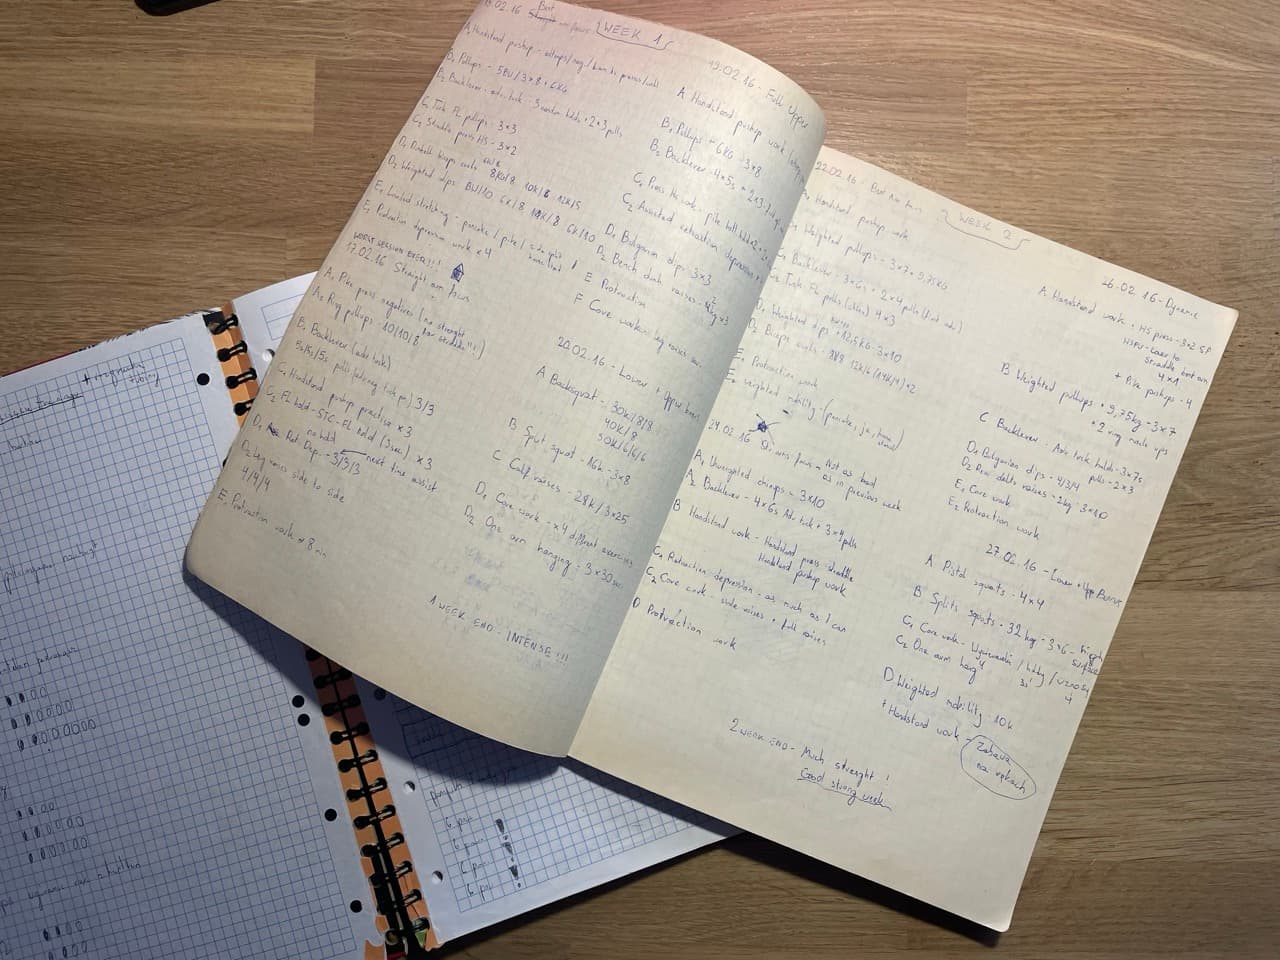
While my training journey has had its ups and downs over the last 13 years I’ve been on it, I have maintained this habit, and I am glad I did.
As I became more educated and experienced, the ability to create training programs that focus on calisthenic elements such as planche, front lever, or muscle up in conjunction with lifting weights and often rehab work (leveraging my physiotherapy background) became my great passion, intellectual pursuit, and primary means of making a living.
Well Designed Program = Game Changer
Better results
Without a doubt, the biggest benefit of a good training program is better results. With a well-designed program, we have a better chance of achieving calisthenics skills, building muscle, and gaining strength over the long term. Correct decisions made over time compound, and having a program is about making calculated, well thought out decisions.
Reducing the risk of injury
I am always careful with throwing around this particular claim, as the topic of injuries is really complex. However, there is no doubt that a well designed training program that incorporates autoregulatory elements is one of the things we can do to keep training workloads in check and mitigate the risk of developing some type of overuse injury.
Piece of mind
When you follow something that has been written and you know it has a good theoretical basis behind it, it can take the constant overthinking and pressure off of you. You start to treat the training process as more of a data collection exercise than a competition. Each training session is a piece of a puzzle, if it goes wrong you can approach it with curiosity, and if some problems occur consistently you can address them in the next phase of the training program.
Documentation
When we follow a training program, we document what we do, which helps us make better decisions in the future. Results become a little more predictable and you know what to avoid. And there is also some psychological value in being able to access your old training numbers and see exactly where you were months and years ago.
Why Is Training Programming Difficult?
In my own training and while working with clients over the years, I have found that the skill of training programming, while very gratifying, can also be very confusing and overwhelming.
Conflicting information, shiny object syndrome and FOMO related to all sorts of training methods and programs, constantly updating sports science literature and new recommendations emerging from it, are some of the problems you may have faced.
In such an environment, it is hard not to overthink and constantly change variables & approaches. And there is a significant danger behind this.
You see, there are activities where we deal with immediate feedback loops. When you play a piece on the piano, you can immediately notice when you make a mistake. And when you practice, you can notice the patterns and correct them as you go.
On the other hand, if you want to become a famous musician, you will see the results of your actions long after you have done them. You may record 4 albums before one of them gets the recognition and attention to your other work that will drive the momentum.
That's an extreme example, because the result in this case is partially related to your musical ability, and a large part is in the shaping industry, economy, trends, and even technology. You don't know if you are getting closer to your goal or if there is a better way, sometimes for years. So you have to stick with something long enough, but never get complacent, and be committed to evolving and iterating.
Training programming, while very practical in nature, is an intellectual domain. We base our actions on data derived from scientific evidence, sometimes more direct - training outcome studies - and sometimes more fundamental - anatomy, physiology, biomechanics, psychology.
We also base our actions on our own data that we collect during the training process. We learn what works, what doesn't, and how our bodies respond to different types of intervention. And we have to do that to some extent because our individual bodies are unique in some ways.
Here is the catch incoming though. The way we validate what we do is through changes that manifest in the biological system that is our body. And just like the economy, our bodies are complicated, dynamic, and they respond to a variety of factors, both internal and external. They are also highly adaptive, but it takes time to see noticeable adaptations.
This is what makes training programming a discipline with a delayed feedback loop. In most cases, you need a fair amount of time to test and validate an idea before you can make more fundamental iterations.
I think that is why so many people struggle with this. Intellectual domains are typically non-linear. The amount of time you put into something doesn't determine your progress. However, training itself, in the sense of "exercising", is a physical domain - which is much more linear, the compound effects and consistency of just sticking to something is what matters.
Therefore, calisthenics programming is a discipline that requires a lot of iteration, testing and entertaining different ideas and points of view. But the way to validate it is through consistency and sticking to an approach over time. And that often leads to conflict.
To give you an example, I may come up with a fantastic way to increase my weighted pull-up. I am going to work my brachioradialis, do partial reps, and train with heavy loads and high frequency.

Sounds great, but now before I have another great strategy - I have to actually test this one, and I won't get an immediate answer. Instead, I'll get a ballpark idea of whether it worked after 2 months, and that's if I roughly control for all the other variables that could be affecting my body (and as mentioned, a lot of things do affect it).
How Do I Use This Article?
In this article, I will do my best to give you 7 concrete steps to building your calisthenics program. Each step is an important piece of the puzzle and should not be ignored.
- Steps 1 and 2 are foundational and will help you set the direction of your training or systematize it.
- Steps 3 and 4 will focus on building an individual training session.
- Steps 5 and 6 will move up the organizational scale and focus on building a training week and consecutive weeks of training.
- Step 7 is about taking a broader look at your training program and applying some long-term strategies to make sure you don't get carried away while being open to iterations.
The interesting analogy is to think of the process of writing a training program as writing a novel. If the core idea is weak, then nothing else will make up for it. If the story is not properly outlined, good writing will not make up for the inconsistencies in the plot. Bad writing can't be made up for by good chapter structure and illustrations.
Finally, if the book is not well written, publishing and marketing will not solve the underlying problem. We'll just be promoting the book, which is substandard, which likely won't make us more recognizable authors if that's our goal.
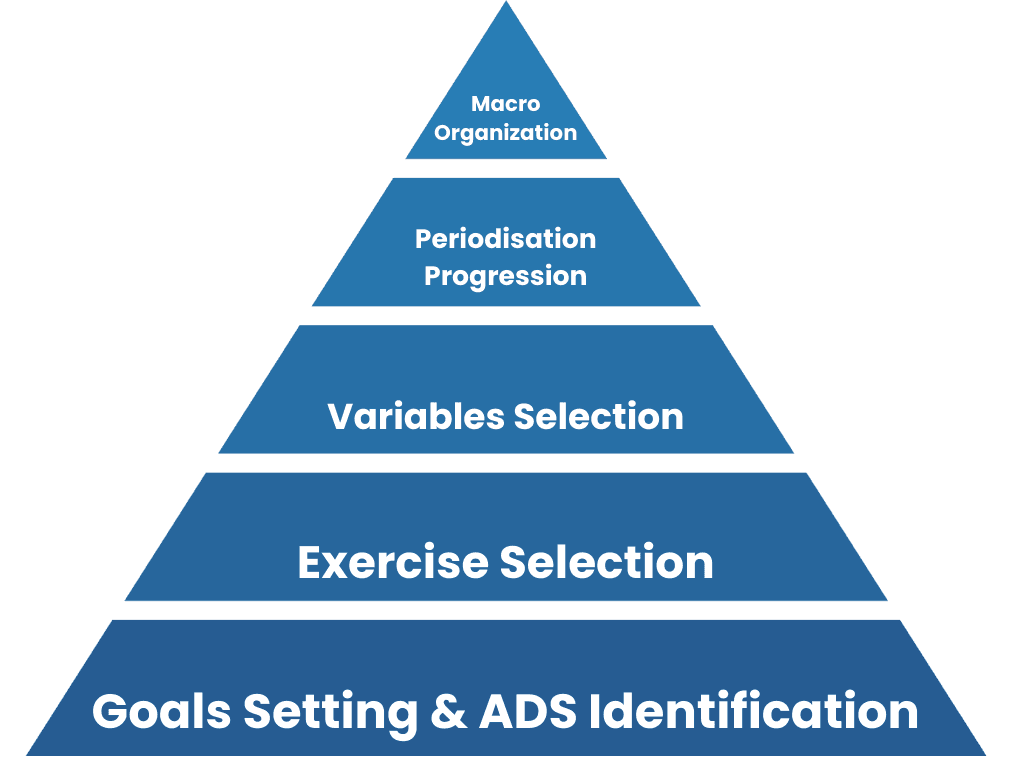
The point of this analogy is to show how each step builds on the previous one. We can have a pretty good training plan if we focus on steps 1-4 and ignore the rest. On the other hand, we can put all the effort into step 7 and it will not matter at all if the previous steps are not taken care of. So, as you go through these points, just be sure to follow them in order and spend some time thinking about each one as you build your training program.
It doesn’t necessarily mean that the pyramid reflects the importance of a step. It rather reflects the order in which things should be planned.
Throughout these steps, we will also go over the actual process of building a sample training program focused on handstand push-ups. Each section devoted to this will borders with this color for better navigation.
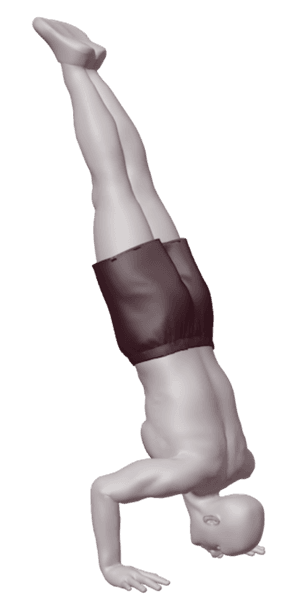
Finally, I want you to prepare... Yes, there is A LOT to cover. But that's what it takes to really dive into the subject and build a calisthenics program with an understanding of the principles behind it.
If that's what you're looking for, you won't be disappointed. However, while we've done everything in our power to make this more consumable, both on the content and technical side, I still recommend taking this article piece by piece so you don't get overwhelmed.
You will also find many links in this article that will take you to parts of our fundamentals library. Whenever I mention a concept that is a little less straightforward, you can read more about it and educate yourself on the subject by reading a specific article.
1. Determine Your Stage of Development
What is The Development Stage?
Before we can begin to build a training program, we must determine our development stage, also known as our training status. I use this term rather than "level" for a very important reason: how good you are at calisthenics is not the sole determinant of your developmental stage.
This is quite counterintuitive because we naturally associate performance metrics with the level of development. While this may be a good metric if we are competing, comparing or ranking athletes, it is not helpful in training programming.
How good we are at calisthenics is a product of multiple factors - not just training, but also our body composition, anthropometry and some other genetics related factors. It doesn't map well to the physiological response to hard training, which is what we're trying to do with training programming.
So the other metric that probably comes to your mind is simply - experience, the amount of time we have spent training. Again, this is not the only determining factor. Just like better performance, greater training age correlates with developmental stage, but it is subject to other variables.
What if someone trained for 3 years, but never really tried to progress, never really approached an uncomfortable point in training, and did not train as regularly during that time? Do they have a higher training status than someone who trained for 1 year, but structured their whole life around it?
Well, all of these are very important in determining the stage we are in, but the single factor that should be considered the most important is the rate of development. In other words, how fast someone is able to adapt to training and get better.
In fact, the goal of assessing rate of development is primarily to tailor our subsequent steps to the athlete's characteristics and to set expectations for evaluating the success of certain interventions we make.
Novice & Post-Novice Stage
In our practice at Calintellect, we differentiate between 2 phases of training, each of which has its own early and late sub-phases. The reason for this is that it is redundant to try to divide athletes into many different categories. It is very difficult, and honestly probably impossible, but it is also simply not useful. Novice and post-novice are clearly different, and that distinction can have a real impact on physiology and training program decisions.
This table illustrates the rough metrics we use to evaluate our onboarding athletes. Keep in mind that progression rate is still the most important aspect, but we can add other things into the mix.
| Novice | Post-Novice | |
|---|---|---|
| Progression Rate | Fast | Progressively Decaying |
| Resistance Training Experience | </= 1 Year | A Couple of Years |
| Coordination/Body Awareness | Low | Decent |
| Psychological Profile | Behavioral Fragility | Habits Established |
| Lean Body Mass | Low | High |
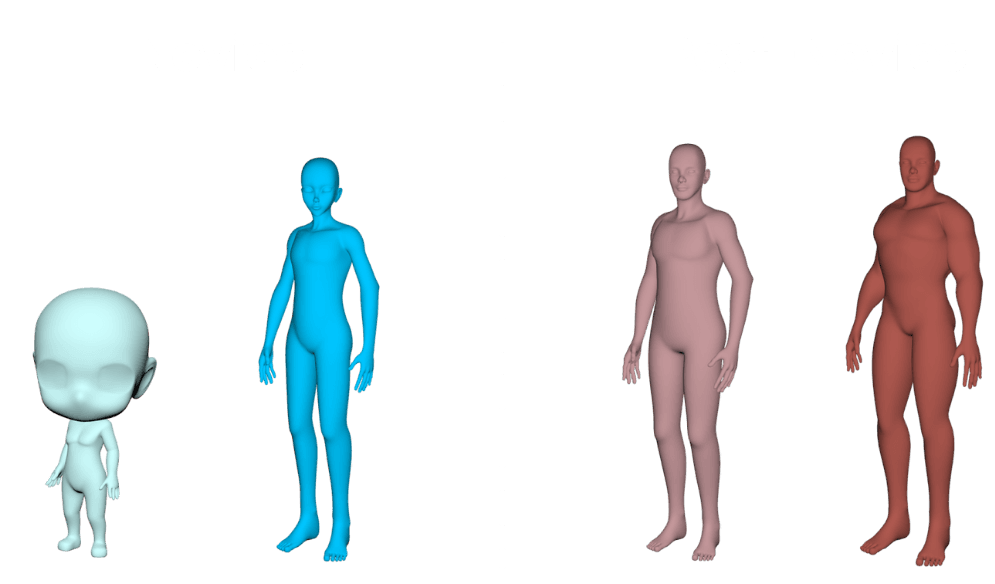
These stages are a continuum, and so the transition between them is also fluid. So don't think of them as forms of Robotboy,
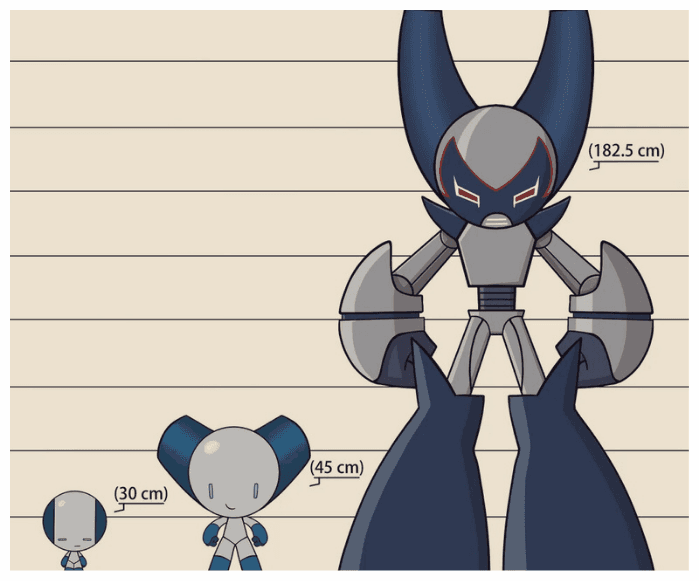
but rather the transition of Goku throughout Dragon Ball and DBZ.

Finally, remember that these levels are also contextual. An individual athlete may be a novice in the lower body while being post-novice in the upper body. Some athletes may be novice in their pushing skills, while being post-novice in their pulling skills. A good example of such a situation are climbers who try calisthenics.
This is just another reason why we should not be overly specific when analyzing these stages, but rather look for general trends.

Actionable Step
Analyze your situation using the chart above and determine if you are more in the novice or post-novice stage. Remember that there is a middle ground, but try to assess whether you are in the late novice or rather early post-novice stage.
For the sake of this article, we will assume that you are in the late novice stage or post novice-stage. The goal is to show you as many applicable examples as possible that you can apply to your training.
You can use the following questionnaire to determine your own stage of development.
What is My Stage of Development?

2. Set Long-Term & Short-Term Goals
The Most Underestimated Step
Once we know our characteristics as athletes, it is time to determine what our goals are. This task may sound like the easiest thing to do. "I obviously know what I want to accomplish, that's why I'm reading this article", you may think.
You would be surprised, but this is the step where most programs fail. As you remember, each step along the way will not work properly if the previous step is not taken care of. However, it’s very common for me to be consulting with clients who come to us with the most "optimized" program they can think of, planned out for the next 2 quarters, while:
- Can't say exactly what they want to accomplish
- Have only a vague idea of wanting to get better at exercise
- Have 4 or more goals
- Have long-term goals without any subdivisions
If either of these scenarios reflects your current attitude toward goal setting, then definitely don't skip this step and let me walk you through the process of how it should be done.
Whe Set Goals?
In the fitness industry, goals are primarily associated with psychology. Specifically, having something to strive for, a vision to motivate us, or behavior change in the context of habit formation.
For motivation, we typically set outcome-oriented goals, which can be either learning a certain skill, lifting some number of pounds, or even winning a competition.
In the context of habits, we use process-oriented goals which are essentially the measurable key components of our journey's success. These can be things like exercising X number of times a week, consuming a given number of calories, or drinking a given amount of water per day.
This is certainly a very important aspect of goal setting. But there is another aspect as well: strategy. Setting goals is essentially creating a long-term strategy for our training process.
In calisthenics, this is extremely important. Powerlifting, for example, is much simpler in this regard because the goals are automatically assigned and ingrained in the discipline itself - squat, bench press, deadlift. It all comes down to these 3 lifts.
In bodyweight training, our options are limitless. We can choose pull goals, push goals, bent arm, straight arm, and on top of that we have the whole world of handstands and flexibility to chase.
All goals are very tempting, yet our resources are limited. Effective goal setting can help us allocate those resources in a way that supports our long-term vision.
Long Term & Short Term Goals
It is good to think of long-term and short-term training goals as two separate and distinct types of goals.
- The long term goal is a certain vision that we want to get to, without much specificity or granularity. It can be vague and the only characteristic it should have is to be deeply exciting to an athlete. It can be planche or front lever, it can be building an impressive physique, it can be competing in calisthenics freestyle competitions. Thanks to the long term goal, our short term goals will feel real and not like something we are supposed to do.
- The short-term goal is basically a checkpoint on the way to the long-term goal. Unlike the long-term goal, it should follow certain rules.

You can use my modified SMART formula for this. I have modified the terms in the acronym so that it retains its form, but changed the components so that they are more compatible with calisthenics and training in general, based on my experience.
- Specific - So they clearly contribute to the long-term goal.
- Measurable - So we can see when we have achieved the goal
- Agitating - So they still feel exciting to pursue
- Realistic - So we can achieve them in 3-6 months
- Transferable - So (if possible) they can be transferred to other goals.
Let's say an athlete wants to learn full planche, this is their ultimate vision of calisthenics success. Based on that, we set up the logical steps that we need to accomplish sequentially before we reach planche, and the first step in front of us becomes our goal, let's say a 10 seconds handstand.
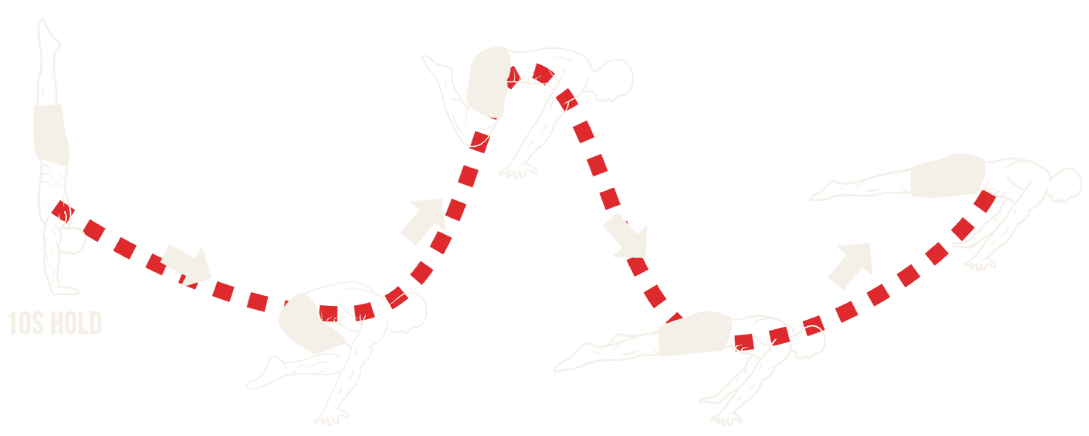
And now that we know what we want, we make the plan. After a few months, he finds that he has achieved his goal and he can move on to the next one, or he has stopped making progress toward his goal and something does not seem to be working. So we adjust the goals of the plan and try again with a slightly different approach.
How Many Goals Can We Set?
As a general rule, the fewer things you work on, the faster you will achieve them. And this is a hard reality for many calisthenics athletes to accept. However, this is also where most programs fail.
It is common in calisthenics to spread our efforts into too many directions and dilute the overall training response.
My recommendation is this:
- Choose as few goals as possible (even from different categories)
- Choose goals from different categories of biomechanical classification
- Select a maximum of 3 goals
Actionable Step
Think about the next few years of your athletic journey and ask yourself, what would be really important for you to achieve. It can be more than one thing, but certainly not more than 3 things. If you choose more than 1 goal, make sure they will not interfere with each other by competing for the same resources.
If you are in the early novice stage (typically the first 3 months of training) - focus on setting process-oriented goals to support your training and recovery habits. At this point, this is much more important than setting a strategy.
When you are further along in your journey, create a list of checkpoints for each of these long-term goals that follow the modified SMART formula. Remember not to have too many jumps between goals, and choose checkpoints that are not only specific to the long term goal, but also fun to work on and transferable to other things if possible.
Handstand Push-Up - Example
For the purpose of this article, we will choose 5 full ROM handstand push ups as a long term goal. Since our status is late novice, let's say we've started to take the first steps towards handstand and we are capable of doing a few pike push ups on the ground with not the greatest form.
In this case, we can split the handstand push up into two separate goals that can be worked on simultaneously:
- Learning the handstand
- Getting stronger for handstand push ups
Both are inevitable parts of the process if we want to get HSPU, but they don't interfere with each other that much. Here is what the checkpoints might look like for a handstand:
- 60s wall handstand
- 5s Chest to wall handstand balance with 70% accuracy
- 2s One leg L stand balance after kick up with 70% accuracy
- 2s Handstand balance after kick up with 70% accuracy
- 10s Handstand balance after kick up with 70% accuracy
- 15s Handstand balance after kick up with 70% accuracy
At this point, your handstand is good enough to begin specific work that combines balance and strength.
Here are the possible checkpoints for handstand push-up strength:
- 50% BW Overhead Press x 1
- 5 bent leg pike push ups on the floor
- 5 straight leg pike push ups on the floor
- 5 floating pike push ups on floor
- 5s negative back to wall handstand push ups
- 3 back to wall handstand pushups
- 8 back to wall handstand pushups
- 5 chest to wall handstand push ups
At this point, your handstand push up strength is sufficient to begin the specific work of merging balance and strength.
Once the checkpoints are reached on both ends (which can sometimes take years!), we can set the checkpoints for merging the two:
- 5 seconds floor handstand push up negative
- 5 second floor handstand push up negative holding the bottom position
- 3 partial handstand push up reps with 3 yoga blocks
- 3 partial handstand push ups with 2 yoga blocks
- 3 partial handstand push ups with 1 yoga block
- 3 freestanding handstand push ups on the floor
- 3 extra ROM handstand pushups on 1 yoga block
- 3 full ROM handstand pushups
- 5 full ROM handstand pushups
And just like that, you have a rough strategy for your upcoming months and possibly years of handstand push-up training.
Your goals may change over time, or one of the checkpoints may be so difficult to reach that it becomes apparent that a better decision is to skip it or replace it with something else. That is totally fine, and actually a realistic representation of what typically happens. However, having a rough roadmap towards your goal is something extremely valuable to have.
3. Select Exercises
First Step of Building a Training Session
Now that we have established the goal, it is time to start working on the program. The first thing we should always start with is the selection of exercises.
In its essence, exercise is really the interaction of internal and external forces. We manipulate the external forces and the conditions under which we overcome them to stimulate certain adaptations.
And this adaptation makes our body more capable of dealing with certain demands, which in turn brings us closer to our goal. This process can be visualized by the Fitness-Fatigue Model.
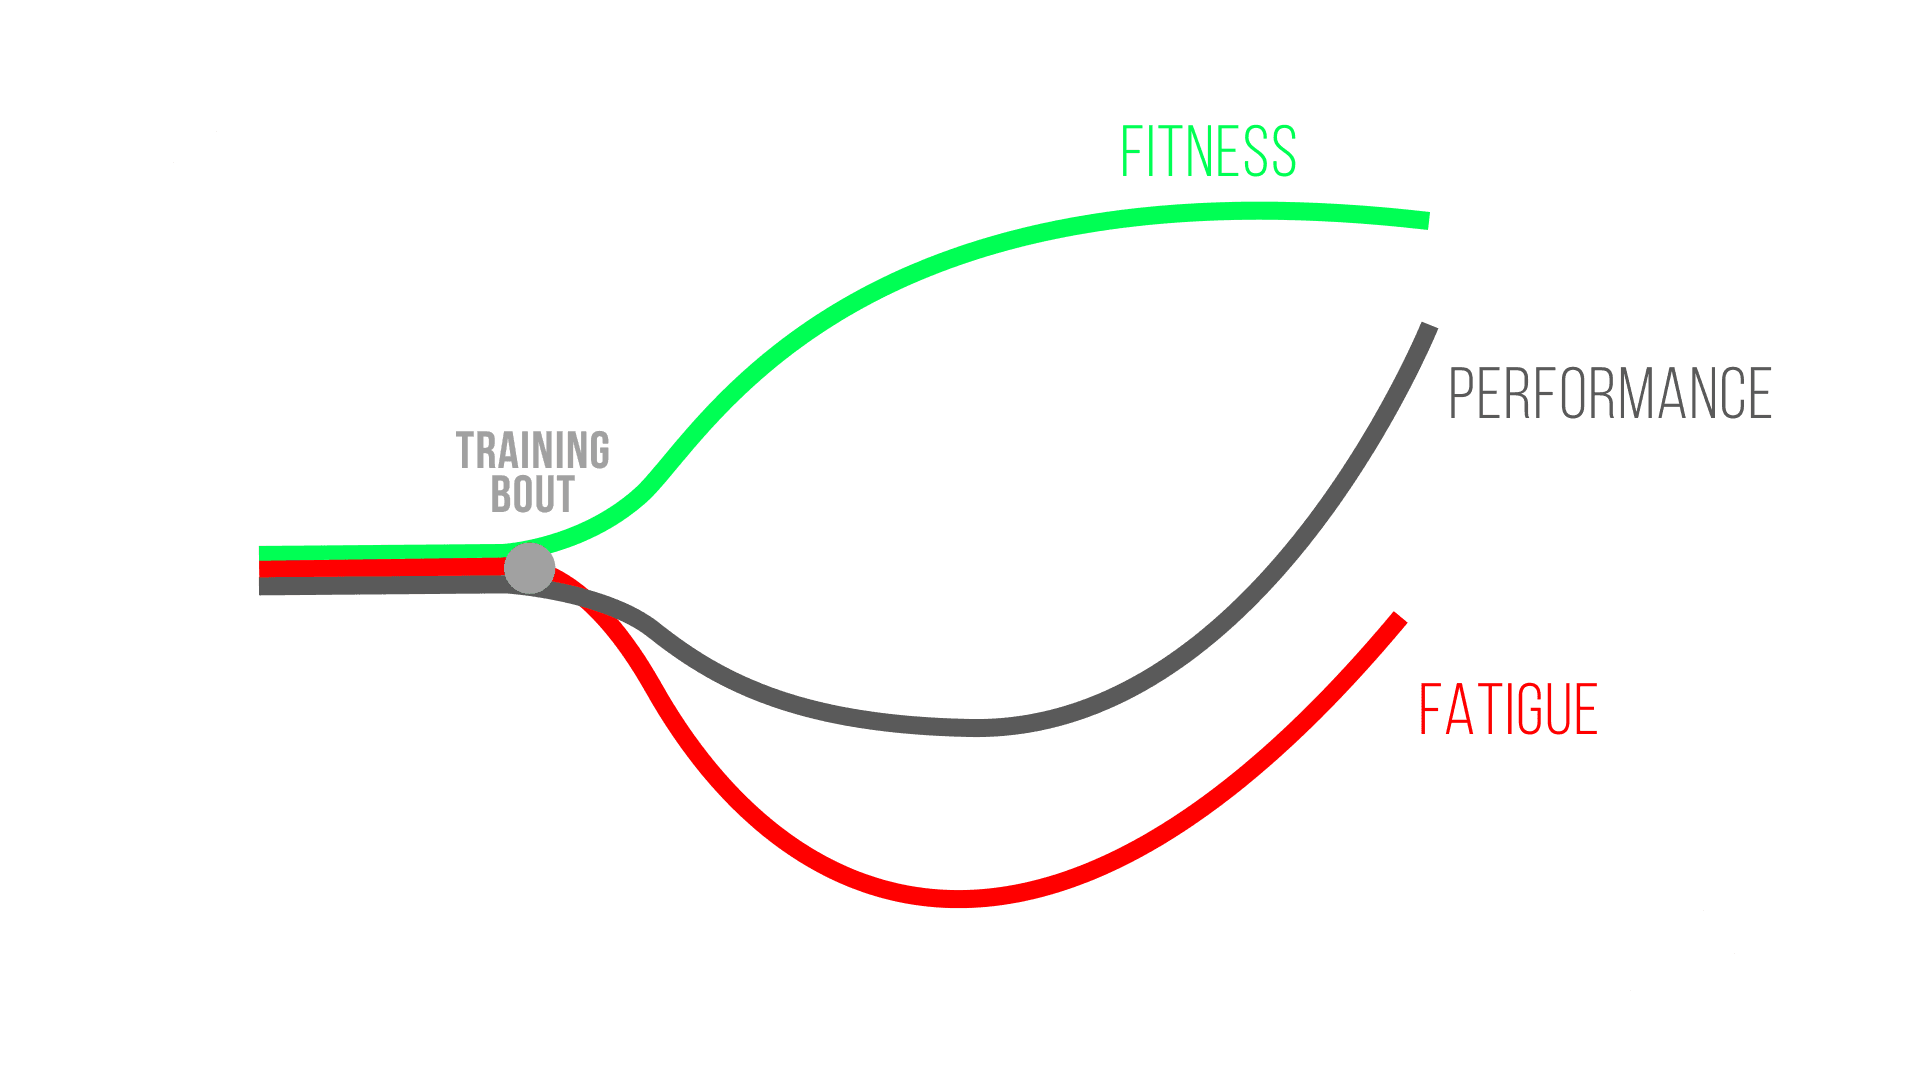
And if we analyze this whole process, we can see that it is specific from the beginning. The exercise is what sets the direction for the stimulus to occur and the cascade of processes that create an adaptation. If we don't get the adaptation we want, we don't get closer to the goal. If we don't create the stimulus we want, the adaptation won't happen, and so on.
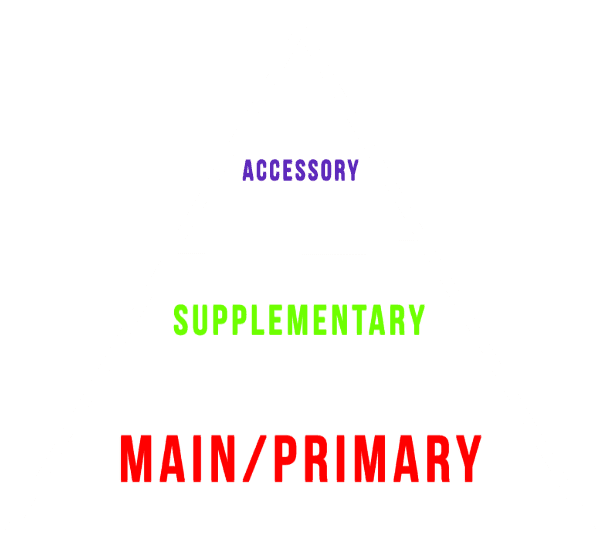
Main, Supplementary, Accessory
In the context of calisthenics skill training, exercises can be classified into 3 main groups, based on the goal they are designed to achieve.
- Main - Specific to the goal
- Supplementary - Specific to the goal, targeting an individual weakness
- Accessory - Specific to a muscle group or region that contributes to a goal
These exercises all have a contributing effect and unique benefits. As a rule of thumb, I always recommend having 1 main exercise in the program, 1-2 supplementary exercises in the program, and 1 accessory exercise for a muscle group or region.
This classification also determines the prioritization. The main exercises are certainly the most important from the standpoint of training any skill. Supplementary exercises can be very helpful, but their role is rather to support the main exercise and add new elements to it. Accessory exercises are not a must, but for some athletes they may be necessary to stimulate muscle growth, which is a powerful mechanism of strength, and thus a mechanism of getting better at calisthenics.
How to Choose the Right Main Exercise?
Choosing an exercise can probably be the most overthinking inducing task. We have so many choices in calisthenics, and it is hard to really choose something from all the options available.
I already talked about this in the article on overcoming planche plateau - one of the reasons why athletes stop progressing is because their efforts are too diluted, in terms of the number of exercises in which they invest their efforts.
For main and supplementary exercises, I use the SIP framework - which stands for Specificity, Individuality and Practicality.
The main exercises should focus on the aspect of specificity. Specificity in the selection of exercises will be manifested through the mechanical properties:
- Muscles used
- Range of motion
- Position of adjacent or main joints in different planes
- Resistance profile
- Muscle action (isometric, eccentric, concentric)
- Velocity
- Relative resistance force vectors
- Coordination elements
Simply put, we want our exercise to be as specific as possible to our goal - according to as many of the above points as possible.
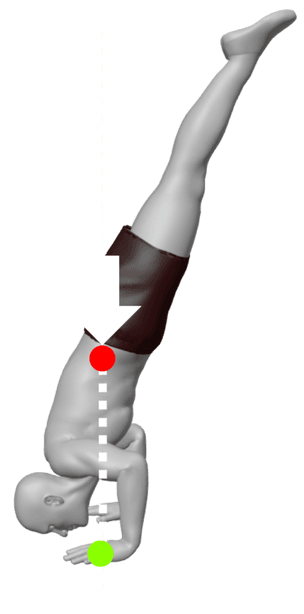
In addition, the main exercise also gets bonus points for being:
- Measurable
- Scalable
Specificity is more important, because that's what ultimately sets the direction for adjustments. Ideally, however, we would be able to notice small changes in performance that are clearly manifested in some aspect of the exercise.
Individuality will still play a role in the selection of key exercises, but primarily as a workaround mechanism in case of injury or pain, or a training history that suggests a particular exercise (that is less specific in theory) has worked repeatedly in the past.
How to Choose the Right Supplementary Exercise?
Supplementary exercises follow the same pattern, they should still resemble the goal we are working on. At the same time, however, they will focus more on the individuality aspect. Specifically, the individual weakness that we notice in our performance of the main exercise. That weakness may be:
- A specific range of motion
- Specific coordination element
- Specific joint or muscle
- Extra element of performance (speed, flexibility, overcoming fear)
Remember, though, that you still want to choose an exercise that resembles the goal in some way. For example, if we are doing Planche Progression Hold as our main work, and we feel that our elbows are a limiting factor, we can add something like Supinated Barbell Straight Arm Press. It will strengthen the elbow complex, but in a specific way.
How to Choose the Right Accessory Exercise?
Accessory exercises are also subjects of the SIP framework, but the context of specificity and individuality is modified towards the goal of stimulating a specific muscle or its region to grow.
All exercises for this purpose should be:
- Stable
- Measurable
- Scalable
Here is a comparison of two exercises in this regard to give you an example:
- A "good hypertrophy exercise" will be the single leg press with the machine. It is stable, we don't move because we are fixed to the machine. It is measurable, we can accurately count the kilograms / pounds. It has a high load potential because we are doing it with one leg and we will probably never max out the machine.
- A "bad hypertrophy exercise" will be the Bosu one-leg squat. It is unstable, we will lose balance before reaching any real intensity. We can't measure it accurately because every rep is different. It doesn't have a high load potential because we can only take so much weight before the exercise becomes impractical and dangerous.
Once we have these basics down, we can select exercises for specific muscle groups. There is no simple checklist here, and there is actually no real consensus on some of the muscle groups in terms of exercises. A simple way to proceed is as follows:
- Simple anatomical functions of a muscle
- Specific analysis of activation data / Internal moment arm length data
- Specific analysis of stretch-mediated hypertrophy data
Good news? The last two points are probably icing on the cake unless you are further along in your post-novice stage (or if you are training specifically for bodybuilding).
And then again, individualization comes in as a tool to bring some of our personal experience and training history into the mix. If a muscle feels more worked in a given exercise, that might be a good sign, and maybe it's worth considering. If an exercise feels painful, even though it's specific, it's probably not worth continuing.
Actionable Step
Analyze the next checkpoint on your goal list and select exercises that will help you reach that checkpoint.
If you are in the early novice stage (typically the first 3 months of training) - focus on selecting simple, compound movements that are not very specific but will build a base. You can follow the selections listed in this article.
If you are in the later novice stage, the focus should still be on compound movements and mastering basic techniques. However, this is also the time when we can begin to introduce exercises that are specific to the skills that the athlete wants to develop.
These drills won't be the main focus yet, but they will give the athlete a first taste of what the skill feels like and the specific demands it places on the body. They should be challenging enough to introduce new demands, but not so complex as to overwhelm the athlete.
For example, if the goal is to achieve planche, incorporating exercises such as planche leans or scapular push-ups would be appropriate. If the goal is front lever, exercises such as straight arm mini pulls or inverted hangs would be appropriate.
In addition to skill-specific exercises, novices should begin to incorporate movements that promote hypertrophy, or muscle growth. This is where accessory exercises will play their role. At this point however, keep it simple. You don’t need any sophisticated approach - curl, tricep extension, lateral raise, crunch / leg raise will typically do their job in terms of the upper body.
For the lower body, as long as it's not your primary goal, you don’t have to include any accessories for the time being. As long as you are progressing on your main exercises of squatting and hinging - you are on the right path.
If you are in the post-novice stage - you can follow the exact format listed in the previous sections. Select 1 main exercise, analyze what your weaknesses are, and select 1-2 supplementary exercises for that. Then, analyze which muscles are involved in the skill you are working on and choose some accessory exercises that target those muscles.
Handstand Push Up - Example
Let's go over this process in the context of our handstand push-ups. To make it more interesting, let's say we've already gone through the strength building and handstand building parts, and now we're at the stage where we're trying to achieve a freestanding handstand push-up.
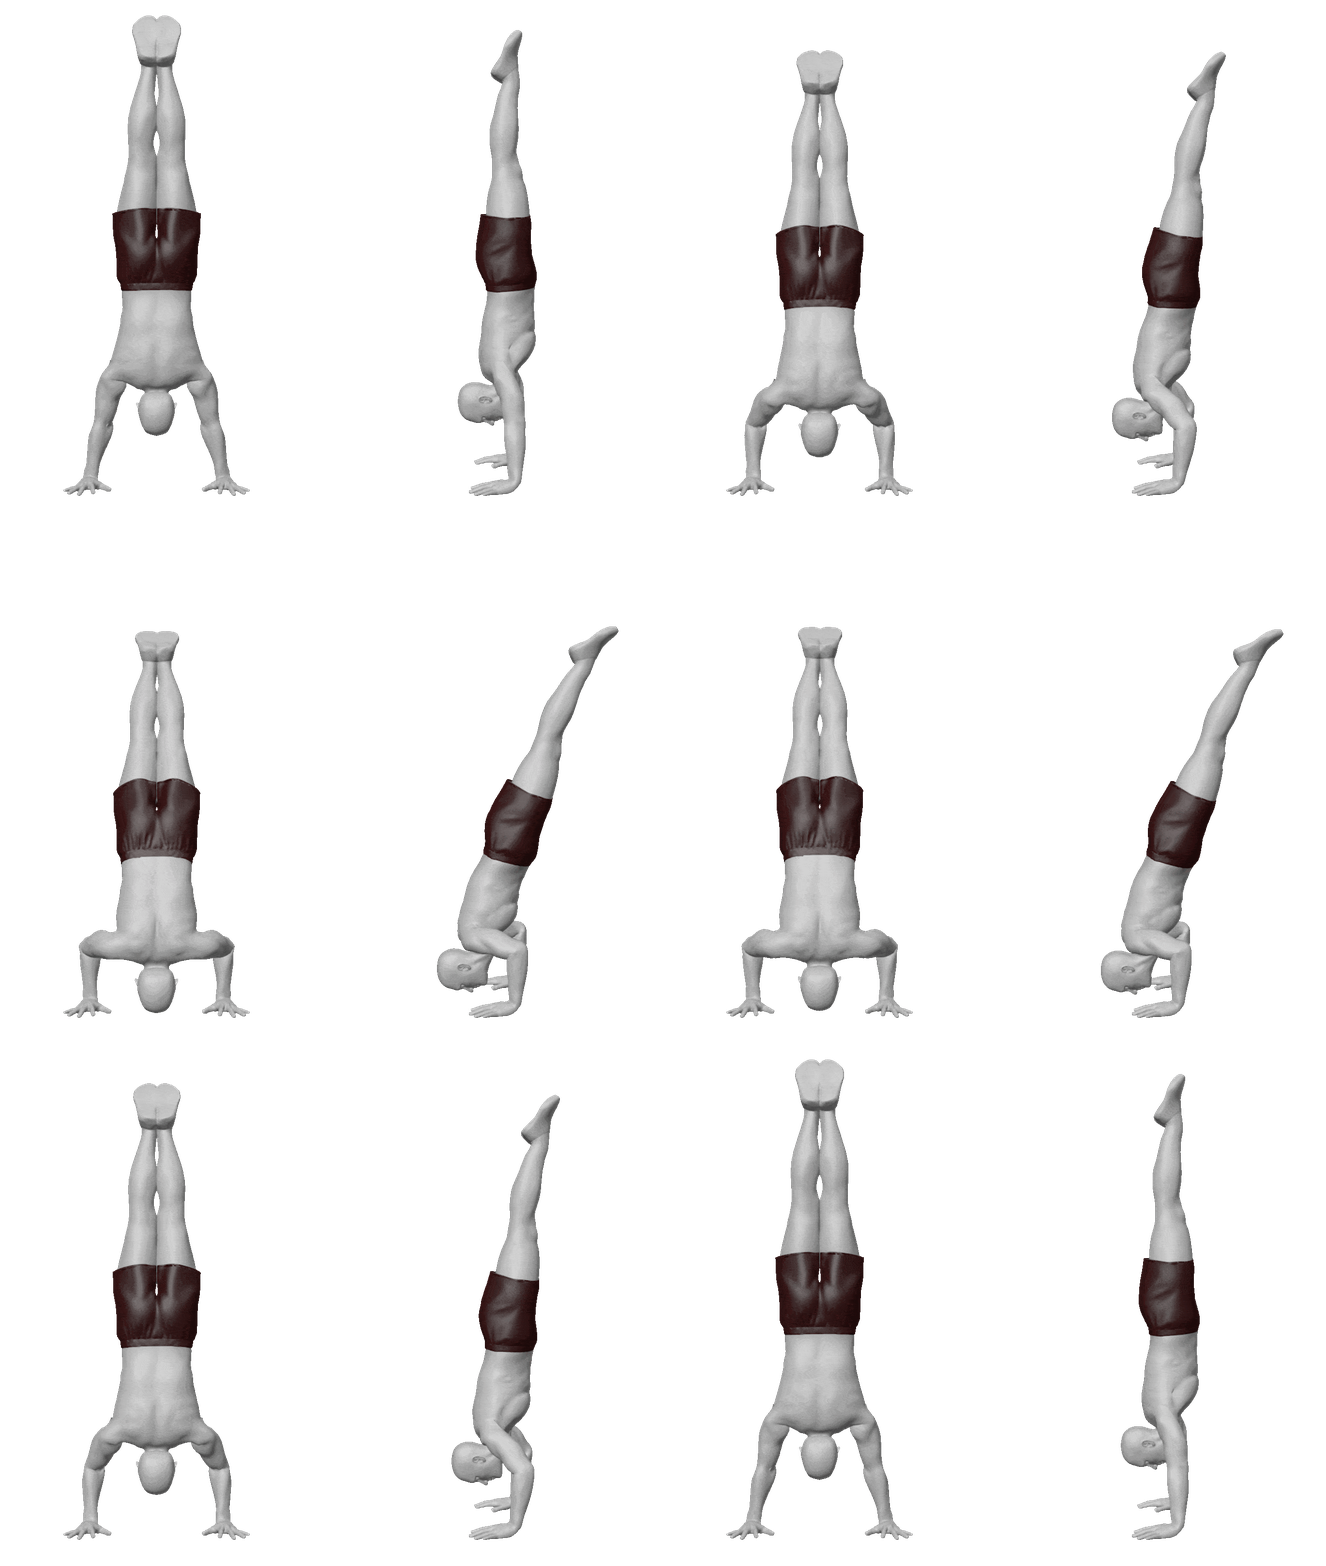
Let’s analyze the specific aspects of this skill:
- Coordination (maintaining balance in a dynamic state)
- Isotonic muscle action
- Vertical press pattern (with a neutral back)
- Bell-shaped resistance profile (full ROM)
- ~160 degrees of shoulder flexion and 150 degrees of elbow extension (full ROM)
- Shoulder flexion range (180 degrees)
Analysis of the muscles involved in the skill:
In handstand push-ups, the main muscles involved are those responsible for shoulder flexion, especially at about 90 degrees of flexion or abduction, depending on the form we choose.
These are primarily the anterior and middle deltoids.
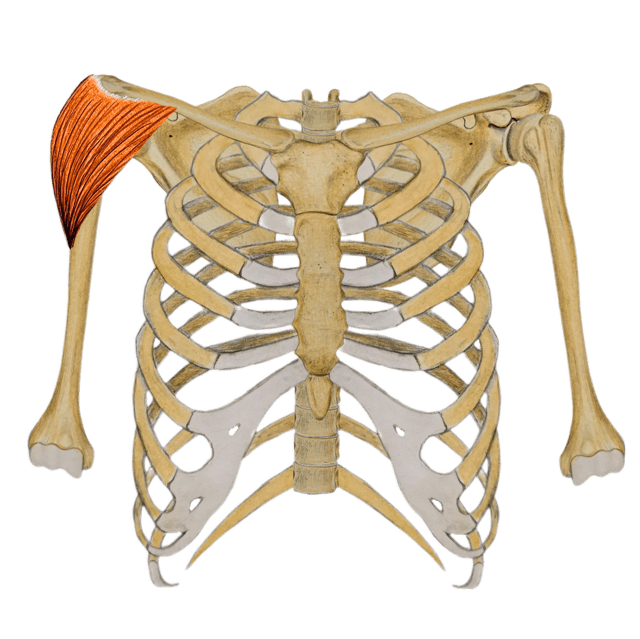
However, the handstand push up does challenge other areas that are also performed by the clavicular region of pectoralis major.
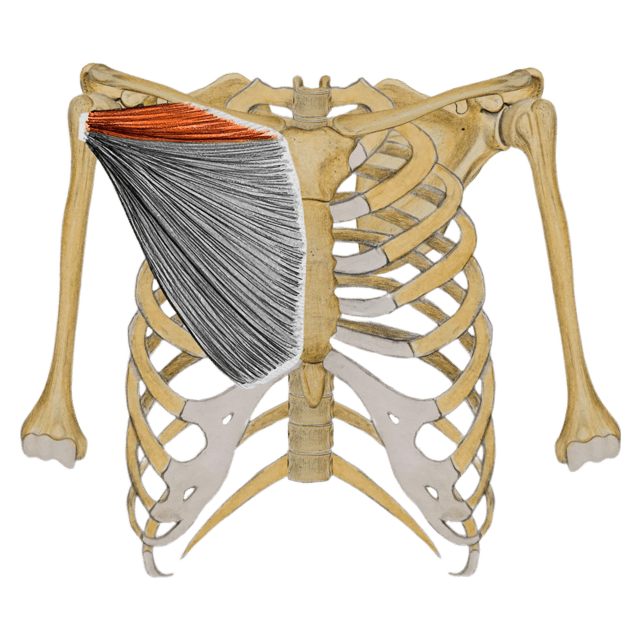
The other function heavily involved in the handstand push up is elbow extension, which is performed by the triceps brachii. Since we are dealing with a simultaneous shoulder flexion, it will likely challenge the lateral and medial heads the most.

Finally, our superior trapezius and levator scapulae will have to work hard to elevate the shoulder blades, especially at the top of the repetition.
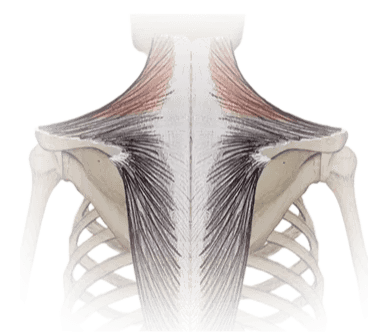
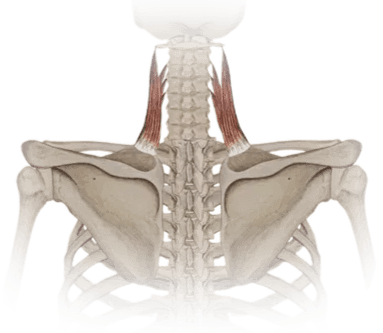
Having all this in mind, let's proceed with the following exercise selection:
Main - Partial Freestanding Handstand Push Up
I choose this exercise because I think it's one of the few that actually targets most of the specificity elements. It uses range of motion as the scaling method, but as long as we compensate in other areas, the lack of specific ROM won't be a problem in this exercise.
Supplementary - Chest to Wall HSPU
In this section I am looking for something that targets the overhead press movement in full ROM. If we display a lower strength level currently, I would put Z-Press here instead.
If we are able to do Chest to Wall HSPUs with a good form, I think this is a better, more specific option. We can practice leaning forward and holding a neutral back while the wall assists with the balance component.
Accessory 1 - DB Shoulder Flexion Stretch
I assumed that one of the weaknesses is the flexibility of the shoulder flexion. I actually see this a lot in our coaching practice. This is more than just aesthetics. Reduced flexibility can make the handstand push-up more difficult, so it is worth incorporating some specific flexibility exercises.
Accessory 2 - Incline JM Press
Since much of our previous work has targeted the shoulder flexors, I decided to dedicate the accessory work to the elbow extensors - specifically the triceps brachii.
The Incline JM Press will likely target each muscle group in the same way as the Handstand Push-Up, since we are dealing with a similar resistance profile at the elbow, similar shoulder position, and most importantly, since torque is generated in the shoulder - the lateral and medial head will likely work harder than in classic extensions - as the long head will simultaneously act as an antagonist in the shoulder joint.
This is a maneuver that is the icing on the cake. But I wanted to show you the whole process and that you can actually get pretty specific in this area as well.
This is the selection of exercises, keep it mind that we may slightly alter it based on other steps in creating a program.
4. Adjust Training Variables
Time For Some Numbers
Creating a list of exercises was a very important step in building a training program.
If we start putting some variables on exercises that are not specific, individualized, practical, or well chosen in terms of scalability and measurability, those variables won't make the program successful.
However, once we have a good set of exercises, we can now think about the more quantifiable metrics to put on those exercises. At this point we will be working at the organizational level of a single exercise and a single training session.
In general, there are 3 primary variables that we can manipulate in calisthenics training:
- Load
- Proximity to failure
- Volume
and 5 additional parameters that, while important, we won't religiously track or change during a workout:
- Tempo
- Rest Duration
- Exercise Order
- Exercise Number (which we have already covered)
- Attention Cue
In this article, we won't go into depth on each of these variables, but rather focus on the practical side of choosing the right values for our training program.
Load
The first variable we need to select is load - specifically relative load. Relative load describes the percentage of resistance that we can overcome for 1 rep in a given exercise that we are working with.
In weighted calisthenics exercises, we can add our full body weight to the calculations in addition to the external weight. We can estimate this 1RM based on the set with max reps at a given load. Try our 1RM calculator for street lifting and strength training exercises.
1RM Calculator
Streetlifting
Result:
Weight Exercise
Result:
For many exercises, we can't estimate the relative load. But this is not a big problem, because from a physiological standpoint, what matters is the duration of a set or the rep range that we are able to take a given load to.
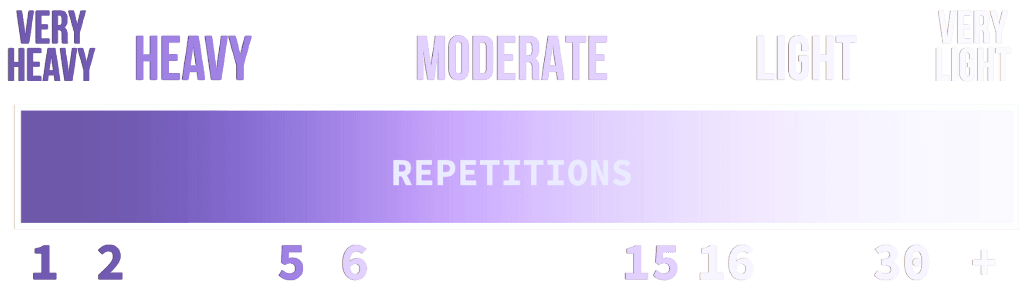
- Heavy loads are those that we can do from 1 to 5 reps
- Moderate loads, from 6 to 15 reps
- Light loads are from 16 to about 30 reps
And for special cases, we can also make two extreme categories of very heavy loads, which would be 1 to 2 repetitions, and very light loads, which would go beyond 30 reps.
For static exercises we can modify the classification slightly:
- Heavy loads - less than 10 seconds
- Moderate loads - 10-20 seconds
- Light loads - 20 to 30 seconds
The extra categories are 2-3 seconds - very heavy loads and over 30 seconds - very light loads.
In general - according to the literature - heavy loads are better at stimulating adaptations that contribute to strength, primarily coordination and motor unit recruitment, but probably other morphological adaptations as well. For this reason, my recommendation for main and supplementary exercises is to use heavy loads.
When it comes to hypertrophy specifically, based on research there is no single rep range that shows a significant advantage over other rep ranges.
Looking at physiology, and following a model where mechanical tension is the most important aspect of growth stimulation, it is likely beneficial to keep the majority of work in the moderate range.
For compound exercises, my recommendation is typically the 6-8 repetition zone. For single-joint exercises, this range is also applicable, but for some exercises we may use the 10-15 rep range for practical reasons. For example, in dumbbell pullovers, standing dumbbell curls, or some cable exercises, too much weight can make us unstable and make the exercise less repeatable.
Proximity to Failure
The second variable that is crucial to understand and incorporate into our training is proximity to failure. This variable is pretty self-explanatory when it comes to understanding it in principle. It essentially tells us how far from failure we decide to cut our set. What is typically more problematic is how to accurately measure and evaluate this variable.
Starting with the point of failure itself - we need to define what it means. The most helpful way to think of it is as a point during a set where, despite maximum effort, we are unable to maintain the external force production required to continue the set according to the established rules.
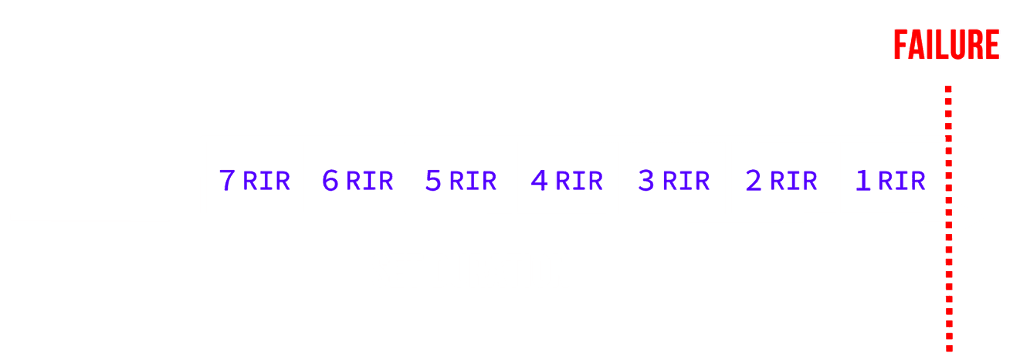
This means that if we are performing handstand push-ups and on the 5th rep we can't do another rep despite maximum effort (yet we try), we have reached a point of failure. If we decide to arch our back, and we are able to complete the rep (reducing the biomechanical difficulty of the exercise) - then it's a matter of interpretation. If we decide that some degree of arching is okay - then we can still count the rep as successful.
I use this framework instead of splitting failure into technical and absolute, because I think physiologically there is no difference between them. It is shades of gray and exercise form is a range, which will at the end of the day depend on the standards we set.
Proximity to failure can be expressed using the RPE scale, Reps / Seconds in Reserve, or Velocity Loss %. The first two methods are subjective, based on our perception of effort. If I feel like I can do one more rep, I'll stop the set, and that's how a 1 Rrir set is done. It has its shortcomings, but according to the literature, it is a trainable skill. In our coaching practice, we primarily use reps / seconds in reserve.
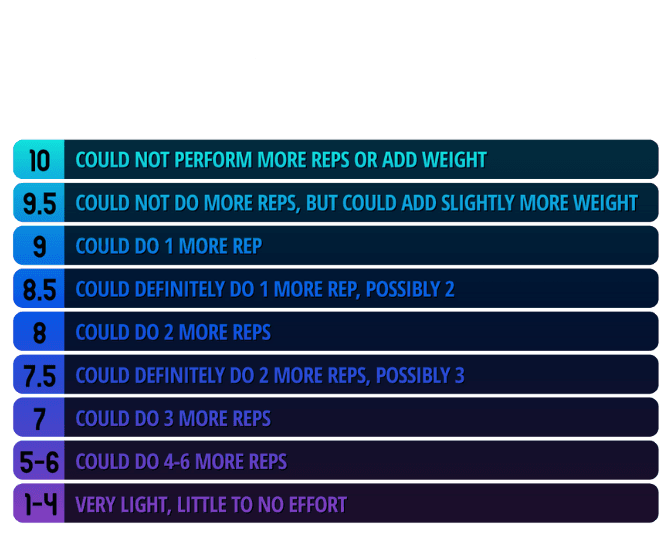
When it comes to strength, the current literature suggests that training a few reps away from failure is beneficial. Since we will be training mostly with higher loads and low repetitions, the advisable proximity to failure would probably be in the range of 1-3 reps in reserve / seconds in reserve.
Obviously, the lower we go with the reps due to load, the higher the proximity to failure will have to be inherently, and since load is the biggest factor in gaining strength, I think it's okay to get closer to failure by training with higher loads. If we are training with moderate loads, then slightly lower PTF is advisable.
While an analysis of the data could completely refute the idea of training to failure for strength, it could be argued that there is a psychological aspect of strength that requires us to train under conditions of high effort. This could make a case for occasional training to failure, especially for people who are in the post-novice phase.
Proximity to failure can be prescribed with a specific rep range or load in mind. For example, I may want to put in the program:
- 50 KG x 1 rir
Which means I’m going to find out how many reps I’m able to do. I may also set:
- 50 reps x 1 rir
which means I have to find the weight for 10 reps.
This is often done during the first few sessions of the program, just to find out what we are dealing with in absolute terms, and then move on to prescribing an objective load with some proximity to failure.
You've probably seen that many programs don't actually prescribe any kind of proximity to failure, but rather just prescribe reps:
- 50 KG x 5 reps
Note that just because a variable is not specified does not mean that the variable does not exist. It is just a matter of what we choose to observe and track.
In this case, the 50 KG sets will probably be done with some reserve at the beginning and at the end the last set can be done almost to failure.
In our coaching practice I often prescribe reps / seconds and not reps in reserve / seconds in reserve in the exercises that are a bit more technical where:
- We don't want to focus too much on effort, but rather accumulate a solid quality volume of technical work
- The exercise is complex in nature and relies not only on strength, but also on coordination
We will explore such an exercise in the handstand push-up example section.
When it comes to hypertrophy, as a general recommendation, 1-2 reps in reserve on the majority of sets is probably the best strategy.
This is the general picture of the current training literature, physiological assumptions, and practical experience. However, there are some caveats when it comes to this variable.
People with less experience can actually push these up to 3 or 4 reps in reserve depending on how much training they have under their belt, advanced people on the other hand can potentially benefit from going to failure.
There will also be some exercises that are less practical and safe to perform to failure. In some exercises that are less complicated on the other hand, we may occasionally reach the point of failure.
Volume
Volume is the quantifying variable that represents the dosage of a stimulus rather than its type. It is probably the most discussed and complicated variable in terms of its measurement.
There are several methods of quantifying volume. The one I primarily use is hard set measurement.
There are many industry experts who argue that this term is not the most accurate in terms of quantifying stimulus, and they definitely have some good points.
However, simplicity and practicality is also an important aspect that can't be underestimated, especially for people who want to program for themselves. In addition, this method of measurement is often used in the literature, which can also help in making some recommendations.
A hard set is essentially a set taken close to failure. How close? At least 4-5 repetitions, which is probably subject to inter-individual variability and our stage of development.
If we follow the previous recommendations on proximity to failure, then our sets can definitely count for volume. With this method, no matter how many reps you do, the sets only count if they get to some proximity to failure.
This method of quantification should have some caveats, so I suggest some modifications to its methods for strength training and hypertrophy training.
The question of how many sets per week or how many sets per training session can be done maximally to produce strength or hypertrophy cannot be answered precisely.
Based on the body of evidence, it probably varies between 6 and 8 sets per workout per muscle group for hypertrophy. For strength, the number of sets is probably lower, probably 4-6 sets per exercise that we want to get stronger in.
Interestingly, however, low volumes (1-3 sets per workout) produce pretty good hypertrophy results and relatively even better strength results.
What we need to understand when it comes to volume is that there are so many things that influence the right amount of work for us that we need to take a more experimental approach to finding the right number for us.
This is why my actual recommendation, for both strength and hypertrophy, is to start a training program on the low end and then slowly increase it over time until we find a point where we seem to be unable to recover properly from session to session.
My recommendation is to start with 3-4 hard sets per muscle group per workout if our goal is hypertrophy, and 2-3 sets per strength exercise per workout (counting all the specific work for a given skill / exercise).
When it comes to muscles, we can simply count the volume for a given muscle if that muscle is mechanically a prime mover.
If we are training for both hypertrophy and strength, then we should already count the strength work in our hypertrophy sets, unless that work is done in the range of 1-3 reps, in which case we can treat such a set as "half the set for hypertrophy stimulation". So if we for example do 2-rep sets of one arm assisted pull-ups, 4 sets of them will count as 2 hypertrophy sets for latissimus dorsi and biceps brachii.
With this solid base, we can simply increase the sets slowly over time, adding a set every 1-2 weeks. Remember that this particular variable is impossible to set in stone. Don't overthink it and just document the amount of work you do each week.
Note that for practical sake, this volume experimentation for calisthenics purposes should likely be done after finding out the right frequency, which is the topic of the next step.
So, after you read about frequency in the next step, it will refer you back to this volume discussion.
Rest Duration
When it comes to rest duration, the basic recommendation for both strength and hypertrophy training is to rest as much as possible between sets.
Strength exercises will probably benefit from 4-5 minutes of rest. Single joint exercises will probably require about 3 minutes. For hypertrophy, our recommendation is to always rest for 3 minutes.
There are some caveats to these recommendations. The most important caveat is that if we have the time, there is probably nothing wrong with resting longer. However, if we can, we should keep an eye on how much we are resting in order to standardize it in our program over the long term.
However, if we are running out of time, the first place we should probably decrease rest time is in hypertrophy exercises and single joint exercises. Where we should maintain as much rest time as possible are compound exercises done for strength or static exercises done for strength.
Exercise Order
Exercise order is a very simple variable that does not change much over time. Simply put, our bodies are likely to adapt best to what's done in the least fatigued state.
This is consistent with the literature in the case of Strength training, which has been shown to benefit from being done first in the session.
In terms of the configuration for skill training, the main exercise should always be done first, then we move on to the supplemental and accessory exercises.
If we are training more than one skill or exercise on a given day, then we need to categorize them based on priority level. However, there are some additional recommendations if we are working on skills that have the same level of importance:
- More Coordination Based Exercises (HSPU before Pull Ups)
- Static Exercises (FL before OAP)
- Shorter Muscle Lengths Based Exercises (Planche before Back Lever)
You can also use an alternating sets strategy, where you basically mix up the exercises and do supersets - but you rest as much as in normal sets. This way the effort is spread out between the goals and we do not make a clear cut in terms of prioritization.
Tempo
Exercise tempo is a variable that is much more inherent in the exercise selection itself. Generally speaking, when we perform a series of lifting-based (concentric) exercises of any kind, there are two main things we can do:
- Self-Select the Tempo (deliberately slow down)
- Use Maximum Intended Velocity (lift as fast as you can)
For strength, if we follow the recommendations in this article and train primarily with high loads, the first strategy is almost impossible to implement.
Even if this was the case, or if we were to select lower loads, we would generally assume that maintaining the intention to lift as fast as possible and to put maximum effort into each and every repetition is the best idea, as it will most promote motor unit recruitment adaptations.
Although the evidence is conflicting, the literature tends to support the idea that maximal velocity is associated with greater strength gains.
For hypertrophy, the situation is a bit more nuanced and interesting. When you move slowly, your muscles technically have more time under tension. However, time under tension measured in this way is not a relevant metric when it comes to hypertrophy training.
That's because what really matters in this context is the mechanical tension produced by high threshold fibers. When we deliberately move slower, we are deliberately not producing as much torque.
So we are deliberately not involving all the muscle fibers in the task. Yes, low-threshold muscle fibers will experience a lot of tension and they will experience the stimulus. However, for most people, these fibers are already at their size limit.
If you continue to push the set until you can't physically maintain a certain pace, you've reached the point of maximum effort and the point where you're not really choosing your own pace, but you're moving as fast as you can even though you're moving slowly.
As you can see, tempo likely doesn't really matter when it comes to concentric contractions and their stimulation of hypertrophy.
The only practical thing that will obviously no longer work in this case are the reps in reserve and the speed-based estimation of the proximity to failure.
Now that our reps take longer from the start, reps in reserve won't be reliable. For this mostly practical reason, the recommendation is to lift things fast, or at least try to do so from the very beginning of the set.
Currently, data on the subject of lifting tempo and hypertrophy is quite mixed, but it generally leans towards an idea that slowing the negative phase to 2-4 seconds can be slightly beneficial, mainly when we talk about single joint exercises. This would suggest that at least a controlled negative is a good recommendation.
During simpler movements we can keep it at 2 to 4 seconds while keeping it at 1-2 seconds during more compound exercises. However, please don’t interpret this as it was a game changing strategy. Lowering slowly doesn’t have as many benefits as it used to be portrayed.
When it comes to strength in this context, the lowering phase should likely be controlled, but not excessively slow. 1 to 2 seconds seems to be a good general recommendation. The practical aspect of it is that especially in some exercises, lowering down very slowly can be detrimental.
If we are performing a handstand push up, it is very easy to lose balance when lowering very fast. In a pull up, when dropping off the bar we may also lose the groove of the set and need to re-apply all the execution points. Likely, the athlete needs to individualize this particular parameter over time.
Attentional Cue
The focus of attention describes how we think about approaching the task. The two main types of cues that direct the focus of attention are:
- Internal Cues (attention to part of the body or movement)
- External Cues (attention to the desired mechanical outcome)
External cues have been shown to improve not only acute strength performance, but also long-term strength outcomes.
Most of the literature on this subject has been done on power lifts, which limits the ability to make specific recommendations. However, when we perform planche, for example, it is better to think about "pushing yourself off the ground" rather than “activating the front deltoids”.
The situation is somewhat reversed when it comes to hypertrophy training. In bodybuilding, the concept of the mind-muscle connection is a very popular one, but by many it has been treated more like bro-science than something that actually works.
However, recent data shows that it may actually have some benefits. What is interesting about this practice is that it increases the activation of the muscle we are focusing on, while often decreasing performance.
How this happens is not entirely clear. The main hypotheses involve the distribution of recruitment across different muscles and their regions.
The problem with internal cues may be that they are not very quantifiable. Just as unquantifiable exercises are not the best choice, internal focus, which can change from workout to workout and affect performance, can be a limiting factor in some ways.
The practical advice is to use this strategy more in the later stages of our training journey, when additional recruitment becomes more important. We should also probably use it in fairly simple, single-joint movements that don't involve a lot of movement variability and a lot of synergistic muscle activity.
Actionable Step
Take the exercise list and apply the recommendations to it. For the main and secondary exercises, adjust the variables based on the rules of strength programming, and for the secondary exercises, adjust the variables based on the rules of hypertrophy programming.
If you are a novice athlete, apply these additional caveats to your programming:
- You can train further from failure
- You can use the low end of moderate loads for strength training
- You can start with even lower volumes (1-2 sets per exercise or muscle group during a single workout)
- You don't have to worry about attentional cues
- You don't have to worry about pace measurement
- You can apply hypertrophy rest recommendations to all of your workouts (you don't need to rest as long)
- Feel free to experiment with different rep ranges
If you are a post-novice athlete, I recommend following the recommendations in the previous sections and individualizing them based on the data collected throughout your training journey.
Handstand Push Up - Example
Let's go over this process in the context of our handstand push ups. We have already established the list of exercises, so now we need to put some numbers on them.
A) Partial Freestanding Handstand Push Up
- [4 sets x 1 rep]
- [4 mins rest time]
- [cue - initiate by breaking in the elbows]
Aha! The first exercise and already something spicy. That's the beauty of examples and practical application.
So, in this particular case, we're dealing with an exercise where I don't typically program reps in reserve because the success of our performance depends on too much of a coordination aspect.
Instead, I prescribe repetitions. Since we are working with singles and the exercise has a high coordination component, we can start with higher sets from the beginning.
B) Chest to Wall HSPU
- [2 Sets x 1-2 Rounds]
- [4 mins rest time]
- [cue - push away from the floor]
Chest to Wall Handstand Push-Ups is an exercise that chooses its own absolute load. We can't really make them harder, and so their development is limited until the rep range goes out of the low to low-medium range.
Then we have to find a way to make it harder, like adding a vest. Since I am assuming we will be at about 3-5 reps, I am not prescribing reps, just reps in reserve. 1-2 reps is a good recommendation in this case as we will be able to maintain a higher quality of work from set to set and not make the back arch too much.
C) DB Shoulder Flexion Stretch
- [2 Sets x 60s]
- [2 mins rest time]
- [cue - feel stretch in lats]
As a flexibility exercise, it will follow slightly different rules, and the prescription will be different. Since we haven't talked about specific flexibility training, we'll leave it for now without further explanation.
Placing it on the C instead of the D can be a good strategy to let the triceps recover a bit after the pressing work.
D) Incline JM Press
- [2 sets x 8-10 (1 rep)]
- [3 mins rest time]
- [cue - focus on feeling the triceps]
Since this is an accessory exercise, we will follow more hypertrophy-oriented rules. We will increase the number of reps to moderate and decrease the number of reps in reserve so that we are closer to failure.
The triceps were already mechanically targeted in the first two exercises, but only this one will make them a limiting factor. That is why I treated the previous sets as 0.5 instead of 1.
Volume:
Skill Work HSPU - 6 setsAnterior Deltoid - 4 sets x 0.5 + 2 sets x 1 = 4 heavy sets
Clavicular Pec - 2 sets x 1 = 2 heavy sets
Triceps - 6 sets x 0.5 + 2 sets x 1 = 5 heavy sets
Correction:
After summarizing the volume using my simplified classification, I decide to add two sets of an exercise for the clavicular pecs (but without targeting the triceps):
E) Incline Dumbbell Fly
- [2 Sets x 10-12 (1rir)]
- [3 mins rest time]
- [cue - focus on squeezing the pecs and stretch at the bottom]
This exercise is going to be a nice hypertrophy choice that targets the clavicular pectoralis major in a stretched position.
It's not specific to the handstand push-up in terms of range or anything like that, but at this point I don't really care. I just want to compensate for some pecs volume.
The anterior deltoid is an overhead muscle and it works a lot in something like partial handstand push-ups. On the other hand, the pec will probably work at a slightly lower angle.
I decided to go a little lighter in terms of weight for safety reasons. When you're close to failure with stretch-focused exercises like this, you have to be careful, and it's much easier to control the situation or react in case something feels wrong when you're objectively dealing with lighter loads. Fortunately, this is unlikely to have a negative effect on hypertrophy.
5. Setting up Frequency and Training Splits
Why Not Train Every Day?
In the previous step, we basically completed the programming of a training session. We already have the macro perspective covered. We have assessed our level of development and set goals, and now we also have the training session that will help us achieve those goals. To go one step further, we need to discover a new concept, that of training frequency.
We should think of our training session as a bout of a certain type of stimulus. Training frequency is a value that tells us at what intervals these bouts are repeated.
When we talk about bouts, we mean bouts of this specific training stimulus - not any type of training. If we train the front lever for instance - this is not counted as the same stimulus as if we train the planche.
For practical reasons, frequency is usually expressed in terms of the number of sessions per week. But our bodies don't have an internal calendar. It doesn't distinguish between Monday, Wednesday and Sunday.
In some cases, frequency can therefore be expressed in terms of the time between consecutive training sessions. For example - training every 3 days means that after each bout there are 2 days for recovery.
Why do we have to wait in the first place? The answer again lies in the fitness-fatigue model. It is determined by two things:
- Fitness - the adaptations causing increase in performance post-workout
- Fatigue - the mechanisms causing reduction in performance post-workout
The rate of occurance is likely rapid for nervous system adaptations. For muscle protein synthesis, being a part of the process of building muscle, likely takes about 2-3 days post stimulus. It's unclear whether hypertrophy occurs during the entire time interval or only in the first part of it (while the rest is devoted to “heal” muscle damage).
For training to be effective, it is likely to be inefficient to repeat the stimulus before the fitness curve has stopped rising or before fatigue has subsided.
If fitness was the only factor dictating our desired frequency, we would assume that for acquiring neurological adaptations we would probably train every day, or even several times a day in the case of coordination, while for hypertrophy it would possibly be every other day or so for the same muscle group - we would repeat training just as the process of building new tissue stops.
However, if you have any experience in coaching or writing programs, you will notice that most protocols never recommend such a high frequency. The reason for this is the second part of the equation - fatigue.
Why should we probably not train before the fatigue is gone? Because both peripheral and central fatigue will limit the ability to generate a new stimulus.
When it comes to frequency and its relationship to strength gains, the data generally supports the idea that higher frequency is associated with greater strength gains, but primarily as a method of acquiring more training volume throughout the week.
On its own, as an independent variable, it doesn't seem to have the same effect.
However, it is interesting to note that the evidence may slightly favor higher frequencies for trained individuals, even when volume is equated, and this effect seems to vary between exercises.
A major limitation of these studies for our application is that the exercises studied are typically power lifts. It is quite possible that the lack of pronounced effects of practicing them more often is due to their rather low to moderate complexity.
It is common knowledge that when we practice a skill, practicing often is the best thing we can do to acquire that skill. All stories of immense practice time in not as physically demanding endeavors like Tiger Woods or Mozart are a testament to that.

This can't be extrapolated to strength training because it involves peripheral fatigue and other adaptations that take time to develop. However, it is possible that exercises that are more biomechanically complex would benefit from higher frequencies.
Of course, not many calisthenics skills are actually that demanding on our motor learning, but I would argue that it is a possibility, especially with pushing skills and certainly with handstand oriented skills.
What Determines Frequency?
While reading the above paragraphs, you may have had some thoughts:
- "So I can't do handstands every day?"
- "My friend works out every other day and seems to be doing just fine"
- "Greasing the groove assumes training every day and it produces results."
These are very good points to consider. It seems that the ideal frequency may be multifactorial and dependent on various confounding variables.
Maybe some exercises are not as fatiguing in nature, maybe we as athletes are different in terms of how fast we can recover, or how fatigable we are, and maybe the way we train in terms of variables affects how fatigued we get.
And probably ALL of this is true:
- Exercises will be different based on the muscles they involve, their stretched / contracted position bias, and how direct they are when it comes to force production as a limiting factor.
- Variables selection will make fatigue different based on the rep range, how close we get to failure, and how much we train in terms of volume.
- Individuals will differ in how resistant they are to fatigue based on age of training (repeated bout effect), genetics, and recoverability, which is subject to diet, sleep, and lifestyle.
Looking at that last point, there is an important word there - recoverability. In other words, the rate at which our bodies are able to return to normal depends not only on the level of fatigue, but also on our ability to recover.
Unfortunately, the current literature doesn't strongly support any particular recovery method, such as compression garments, foam rolling, or ice baths.
These things may alter the delayed onset muscle soreness (DOMS) that we experience after exercise. But DOMS is not strictly related to fatigue physiologically. They may overlap, but are probably the results of different mechanisms.
So, the only thing we can probably do to increase our recovery is by:
- Adequate quality and quantity of sleep
- Adequate quality and quantity of sleep
- Reduction of major physical stressors outside of training
- Managing mental & emotional stress
This doesn't mean that we should become obsessively paranoid about these markers. It's just to suggest that it's probably better to spend that 30 minutes at night on extra sleep rather than a foam rolling session - if our goal is to recover for the next bout of exercise.
How To Program Frequency?
When programming frequency, we need to do something similar to what we did with volume - find a certain starting point and then iterate over the coming weeks.
The ideal frequency can range from training every day to training every 5-6 days. Here are some recommendations as a starting point:
- Use our skill fatigue chart to assess starting point
- If you mostly train at higher loads, you can probably train more often
- If you mostly train away from failure, you can probably train more often
- If you do less volume per session, you can probably train more often
- If you were always naturally excelling at endurance activities, while not being the most bulky kid in the class, you can probably train more often
In reality, for most people and skills (except handstand), when training with the established recommendations in terms of exercises (including hypertrophy work) and variables, our frequency will range from training every 3rd day to training every 5th day.
I recommend starting with training every 5th day and then after 2-3 weeks increasing the frequency to training every 4th day and then to training every 3rd day.
I don't think most of us can get away with training more often than that with the previously recommended variables. That doesn't mean you can't try.
What are signs that recovery time was not adequate?
- Repeated inability to improve performance
- Significant DOMS
- Takes a long time to warm up
- Noticeable joint discomfort
And once we have our frequency of training set, that's when I would start making adjustments to the volume that we talked about in the volume section. Why this order?
Frequency is probably more important for strength because we can practice more often. In addition, we know from research that work done early in the session is generally more effective.
This means that if we train 3 times a week with 2 sets, we are likely to accumulate more quality work overall than if we train 1 time with 6 sets.
However, this is a bit of speculation based on my coaching experience and physiological understanding of the training process. At the moment, the data on frequency is rather unclear.
If we want to gain as much strength as possible in a limited amount of time - then we could argue for increasing frequency - but then at the expense of:
- Accessory exercises
- Training to failure
- Higher reps
- Higher volumes
- “Intensification techniques” (like drop-sets)
This approach will probably not work long term because we are not stimulating hypertrophy, which is a very important strength mechanism. So I would rather use it for or any kind of short-term preparation.
What if I Need a Weekly Schedule?
Most people still want and need a more stable approach that requires a certain repeatable weekly schedule.
In this case, because the week has 7 days (an odd number), we will never get an even number of rest days between sessions using this approach, unless we train every day or once a week (neither of which are the best strategies, as we know). That is the brutal, mathematical truth of the world.
Well… maybe that's a bit too dramatic a way to put it.
A simple solution to this is to slightly reduce the volume of one of the days. For example, if we want to train on Monday and Thursday, it's best to train hard on Thursday and light on Monday.
That way we get 3 days off after a heavy session and 2 days off after a light session. It may only be a few sets more or less, but it will make a real difference.
Training Split
This brings us to the topic of training splits. Training split is basically the way to apply training frequency in a logical way.
It dictates the time between sessions and integrates different elements of the program within a training week. Essentially, it distributes the work over a week in a logical manner.
- A properly designed training split allows us to put in as much quality work as possible within a micro-cycle
- A poorly designed training split will limit our ability to put in that work
By itself, a training split won't do much because it's ultimately an organizational strategy. It is just to make sure that we do not undermine the results of our training program by poorly distributing the work.
Imagine you have a training session A and a completely different training session B. And in both cases you want to have a training frequency of 2.
A badly designed split would take all the sessions back to back and separate them so that session A goes back to back and session B goes back to back.

A well-designed training split will spread the sessions out so that there is a break between each session and the work is spread evenly throughout the week in case there is some interference effect between the individual workouts.

This is especially true if you have more than one goal. There are two most popular approaches to splitting training.
- Topographical Approach
- Full Body
- Upper & Lower
- Anterior & Posterior
- Body Parts Split
- Movement Characteristics Approach
- Push & Pull & Squat & Hinge
- Straight Arm & Bent Arm
- Long Lengths & Short Lengths
- Skills / Main Exercises Split
When designing a training split, ask yourself:
- How many days a week am I able to train?
- On which days am I able to train?
- How often do I need to train to achieve certain goals?
If you are able to train more often, you can spread out your training more. For example, you can train front lever 3 times a week and planche 2 times a week - for a total of 5 times a week.
If you can't do that, then hitting the frequency for the goals becomes a priority. You will want to train the upper body 2 times a week and the front lever alone 1 time - by training the entire body 3 times a week with this type of split.
Remember that this cadence is subject to change, it is not set for life and can be consistently iterated.
Actionable Step
After your first training session, take some time to recover and then repeat the session. Through trial and error, you will be able to determine the correct frequency of training for a given minimum volume.
Then, once you have the training frequency set - and modified if necessary based on the weekly schedule - you can begin experimenting with slowly increasing the training volume.
Based on the training frequency, as well as your preferences regarding the number of training days per week and specific training days - choose the training split.
If you are a novice athlete, a full body session 2 times per week is typically a good choice.
The more you move towards the post-novice phase, the more you will probably need to split your training into more days. The easiest way to do this is with upper-lower splits and push-pull-lower splits.
Handstand Push Up - Example
Let's review this process in the context of our handstand push-ups. We are currently at the point where our session is programmed. Let's experiment with frequency:
- HSPU Session 1
- (4 days rest)
- HSPU Session 2
- (4 days rest)
- HSPU Session 3
- (3 days rest)
- HSPU Session 4
- ...
As we proceeded with this process, we noticed that at first even 4 days was a bit taxing to recover from. However, due to repeated bout effect, we were able to recover faster and do a good job consistently, so we decided to reduce the number of rest days to 3.
Since it went very well, we decided to reduce the rest to 2 days, but we noticed that the performance became quite inconsistent. We may try to increase it in a few months, but for now 3 days of rest seems to be a good choice.
In addition to our handstand push-up work, we want to do some training for other muscles. Our schedule allows for training 3 days a week, and as we already know, we need to train handstand push-ups about 2 days a week (3 days off between sessions). So the best split configuration will probably be
1A) HSPU + PUSH
1B) PULL + LOWER
1C) REST
1D) REST
2A) HSPU + PUSH
2B) PULL + LOWER
2C) REST
2D) REST
...
As you may have noticed, this is a 4-day cadence. And it won't work if we have to have a stable schedule throughout the week for practical reasons.
If we have to have a weekly schedule, then every other cycle there will be 1 rest day instead of 2. And because of that, the session that precedes it will have to be a little lower in volume. We can simply reduce the number of sets in the accessory exercises:
1A) HSPU + PUSH (higher volume)br1B) PULL + DOWN
1C) REST
1D) REST
1E) HSPU + PUSH (lower volume)
1F) PULL + DOWN
1G) REST
2A) HSPU + PUSH (higher volume)
2B) PULL + DOWN
2C) REST
2D) REST
2E) HSPU + PUSH (lower volume)
2F) PULL + LOWER
2G) REST
...
6. Set Up Short Term Progression & Periodization
Routine VS Program
At this point we have a plan that we could call a "very good routine". And, quite frankly, this is where most programs often end up.
When I was in middle school back in 2016-17, I occasionally gave people workout advice and sometimes made a buck or two by writing workout plans for them.
And it was pretty common back then, at least in my environment, to think of a "training plan" as just that - a weekly training schedule, a prescribed routine.
However, the word "routine" suggests that there is something missing to call it an actual "training program". And that “something” is the integrated dynamic process that promotes the long-term development of an athlete.
If we want to create a real training program, we can't leave our current plan where it is. Let's first take a look at the general way of organizing training.
Micro, Meso, Macro cycle
In general, we can divide the training time into different organizational time frames. In this case let’s focus on the specific 5:
- Training Bout - training session
- Microcycle - 4-10 days of training cadence (typically one week)
- Mesocycle - 4-8 microcycles
- Block - 2-3 mesocycles
- Macrocycle - 2-4 blocks
This is not just about time. In this kind of structure, every element is connected. What we do in a training week is part of a strategy for a mesocycle, and that mesocycle is part of a strategy for a macrocycle.
At each of these levels of organization, we can apply certain dynamic processes to training to promote long-term adaptation. These processes are progression and periodization.
Progression
The first process we need to talk about is progression, which you probably heard about a lot of time in any training related discussion.
Exercises can be scaled up or down - made more or less difficult by an objective manipulation of their mechanics or external load. Progression, on the other hand, is what we would call our actual relative improvement.
And we would think that those two are totally dependent on each other, but they're not. I can scale up the exercise and therefore increase the load, and I can push it closer to failure. At the same time, it doesn't mean that my actual ability to handle that load has increased. Let’s take a look at this example:
- 1) 10 KG x 10 reps (3rir)
- 2A) 10 KG x 13 reps (0rir)
- 2B) 12 KG x 10 reps (2rir)
If session 2A or 2B follow session 1, some would say that the progress was being made. And yes looking independently at some variables we could say so.
But this is why tracking all variables is more insightful. In reality, in neither of these cases a noticeable progression can be detected.
Progression would occur in such scenarios:
- 2C) 10 KG x 10 reps (2rir)
- 2D) 10 KG x 11 reps (3rir)
- 2E) 12 KG x 10 reps (3rir)
So there is a clear distinction between these two, but very often people try to force progression by increasing one variable at the expense of another variable. I am not saying that this is a bad practice, it's just that we can’t call it progression.
This is also why I tend not to use the term "progressive overload" in my educational materials or communication. Overload suggests that we need to force progression in some way (promoting the 2A strategy from above).
Back in 2022, as part of one of the FrinksmovementTV projects, I interviewed Dr. Austin Baraki, a physician and one of the key members of the Barbell Medicine team. I remember him mentioning the term "progressive loading" in the context of rehabilitation, which has sparked my attention. I would certainly recommend listening to their podcast on the subject.
Progression Model
A well-designed progression model is a pattern of increasing objective training demands with the assumption that progression will occur.
And that assumption is dictated by our history and how fast we progressed in the past, as well as our experience and current strength level.
So the idea of the progression model is to maintain the relative demands of the exercise while increasing the objective demands. We don't want to just make things harder, because that's not progression, that's changing the characteristics of the stimulus.
We will assume a certain rate of progression and apply the model of increasing objective demands accordingly.
There are two distinct types of progression models:
The first fixed progression model is load progression. Load progression focuses on gradually increasing the weight or resistance used in an exercise while holding other variables constant.
This can follow several patterns, such as linear progression, where the load increases by a fixed amount each session (adding 2.5 KG to a barbell squat each workout).
Step Progression on the other hand takes a more conservative approach, maintaining the same load for several sessions before increasing it to allow the body time to adapt.
Within these patterns, rep schemes such as straight sets (3x10 or 5x5) or reverse pyramid training (starting with the heaviest set and decreasing the load) provide structure to the workout.
This method works best with exercises that allow for precise load tracking, such as barbell lifts or weighted calisthenics exercises like weighted dip or weighted pull ups.
The second method is . Double progression combines load and repetition increases, progressing the reps first before increasing the load.
This system works well for exercises where incremental load adjustments are challenging, such as those using dumbbells, kettlebells or bodyweight variations.
Double progression can be implemented using a set battery approach, where all sets progress together, or an individual set basis, where each set progresses independently.
We can also use an autoregulative progression method. The concept of autoregulation is an adaptive strategy in resistance training that accounts for variations in daily performance due to both training-induced fatigue and transient lifestyle factors such as sleep, diet, and stress.
The method that can be used is autoregulative individual set load progression. This method adjusts the load based on the RPE of each set during a workout.
For example, if a set scores 7-8 RPE, the load remains the same for the next session. If it falls below 7 RPE, the load is increased. if it reaches 9-10 RPE, the load is decreased.
For exercises such as band-assisted planche, where load scaling is less precise, we can use the autoregulative double progression model with RPE integration. The athlete progresses by increasing the number of repetitions or hold time within a set RPE threshold. Over time, as the athlete achieves goals (for example 12 seconds at RPE 7-8), they progress to a lighter resistance band.
Long Term Progression?
When we plan our progression, we typically plan it in the context of a single training session, or at most at the mesocycle level, so that each week we increase the objective demands of a training session.
However, this progression could technically be planned on a larger scale, such as a block level (mesocycle to mesocycle).
Did you know that the most elite powerlifters sometimes train a whole year just to increase their lift by less than 5 kilos or less? At a certain level, the progression model has to adapt to our very slow progression, which naturally slows down over time.

But does this mean that these powerlifters will literally train with the same routine for an entire year, only to add a few kilos to the bar as the year progresses?
No, because progression is not the only element that can be incorporated into the training program. This brings us to the next process that can be applied to training - periodization.
Periodization
The way we could describe the concept of periodization in general is that it's a planned manipulation of training variables to maximize adaptations. That is, it involves some sort of change in the variables we have already mentioned within the training program.
So while progression is about maintaining the relative demands placed on the body, periodization is about varying the relative demands placed on the body.
There are 2 general ways in which these variables can change over time:
- Linearity
- Undulation
Linearity refers to the constant increase or decrease of certain variables over time. For example, we can add 5% of relative load each week and do fewer repetitions to match the proximity to failure.
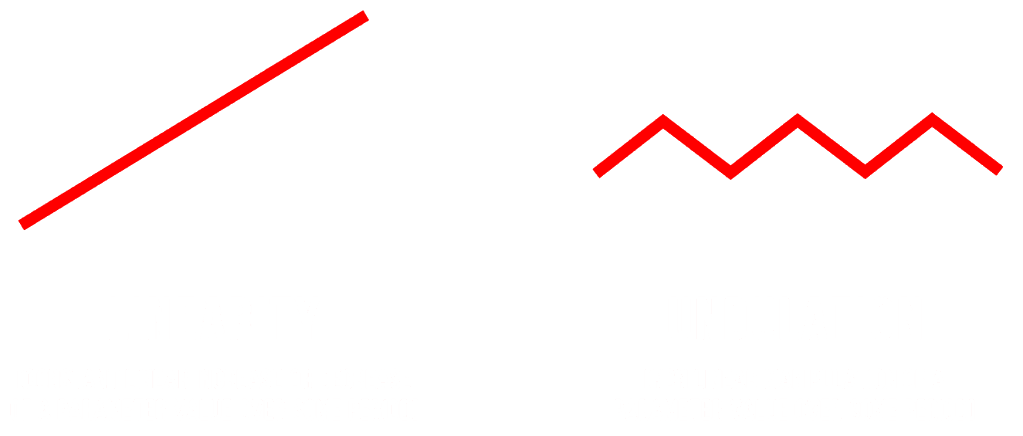
We can also linearly increase the proximity to failure at a given load. For example, starting at RPE 6 and increasing the number of repetitions at a given load each week until you reach failure in the last week.
Although I don't really recommend it, the same goes for the third variable, training volume. We can linearly add sets to an exercise every single week while holding other variables constant.
The second element that can be integrated, undulation, refers to changes that occur in a non-linear fashion but fluctuate over time.
For example, one day or week we train at a certain load and the next session we train at a 20% higher load. Another example would be to train one time at RPE 6, another time at RPE 8 and another time at RPE 9.5 and then back to RPE 6.
Volume, of course, can also be subject to undulation, such as doing 5 sets one day and 3 sets the next (which we kind of already integrated in our program for handstand push up as you remember).
But Why Even Periodize?
Periodisation used to be a hot topic. Not only in fitness as a whole but also in the calisthenics space. Till this day, periodisation seems to be a badge of a well written training program. Like, if someone mentions that word, they know what they are talking about.
The problem with it is that periodisation itself, is not really something that we can say for sure improves our training results.
While research seems to support an idea that periodised training may have a slight edge over non-periodised training, it is difficult to implement it directly. One problem lies in defining what periodisation is and what it is not (approaches vary between studies).
Second problem is that the current body of literature doesn’t help us to differentiate if periodisation benefits noted in research are due to variation in training stimulus or due to specificity of training with high loads near post-study testing. The comment of Nunes et.al on Williams et.al meta-analysis from 2017 is likely the best description of this point, if you are interested.
The general trend is, that the more we zoom out from the muscle fiber physiology to planning macrocycles of training - the more murky and less directly applicable the research becomes.
And this is just the nature of things. Our bodies are extremely complex, and at this point there are so many confounding variables that it's hard to control for in research and then take specific applications.
I still think that there is a place for both linearity and undulation. But, these points are less scientific and more practical or anecdotal in nature.
The arguments for linearity mainly revolve around building a specific quality that we want to achieve. Our body tends to respond well to the slow building of a particular quality over time.
If we want to build work capacity, we will add sets. If we want to build strength, we will slowly increase the relative load, hoping that all the training we do in the lead up will have a positive effect. It is often associated with a specific time frame, such as a competition.
Undulation, on the other hand, is mainly used as a tool to manage fatigue within a certain time frame or to build up different qualities at the same time, sometimes it is also used as a psychological tool to break up the staleness of training.
Both linearity and undulation can occur on many time frames and both can occur simultaneously.
For example, this is a program that is linear in the microcycle and undulating in the mesocycle:

This program is undulating within the microcycle and also linear within the mesocycle:

This brings us to the important point. When we talk about periodization, there are many different configurations that can work. And whatever we do with these changes, we can say that we are periodizing our training. Periodisation cannot be however implemented on the same organizational level as progression. That’s just because they essentially try to achieve two different things, one tries to maintain stimulus, while the other tries to change it.
Variation (Special Type of Periodization)
A very important variable that can be periodized is the selection of exercises. In this particular case, we are talking about a specific type of periodization known as variation.
When it comes to hypertrophy, the literature currently suggests that more variety in the training program in exercise selection may be more effective than including only a single variation.
There is some inconsistency in the data regarding exercise variety and its effect on strength. However, it seems that the mechanically complex exercises benefit from more specific practice (not much variation), as progress in them is largely based on improving coordination.
At the core level, exercise variation can be applied for 4 specific reasons:
- Regional hypertrophy (stimulating specific muscle region)
- Weak point targeting
- Avoiding cumulative connective tissue stress
- Breaking routine (psychologically)
When we change exercises, we shouldn’t make too many changes at once, especially changes that address different perceived problems. Any changes we make must be done in conjunction with a single rationale.
In general, in most programs, I would advise adding variations to the main exercises only at the macrocycle level. The reason for this is that main exercises are designed with specificity in mind. Specificity is what requires consistency and practice. The more we do it and the more often we do it in a frequency sense, the better.
Supplementary exercises, on the other hand, can benefit from variation on a block level. Within a mesocycle, I would stick with a given variation and then evaluate its usefulness in the next mesocycle.
Accessory exercises can incorporate variation in the most free way. I think they can be included at the microcycle, block, and macrocycle levels.
Pick a goal. Each small box is one training day of that week. Tap any exercise with a next to it to watch it. Click any supplementary or accessory exercise to see which days it covers. The main skill is trained in every training.
Actionable Step - Novice Phase
Once you have your training plan, first think about all the exercises and apply the progression model to them. Then optionally add the periodization & variation to them.
At a very early stage of the novice stage, instead of pre-planning the progression pattern and scheme, it makes more sense to be more reactive to the performance, with the caveat that we need to maintain a certain level of conservative attitude when increasing loads.
In practice we will just scale things up with intuitive pacing. When it comes to weight training, we may have a rule that we won’t increase the load by more than 5 KG per session, which could be a nice conservative approach that still allows for rapid improvement.
The use of more sophisticated progression schemes is, in my opinion, unnecessary at this stage and should rather be used after the initial phase. I would also not consider periodization or variation at this stage, as consistency in doing the same things is king at this stage.
If you are in the later novice phase, you can start to incorporate more structured, fixed progression schemes.
For strength exercises, I would recommend a load progression model. As long as we are able to, we can just progress in a linear way and keep the increment at a reasonable point - for example 2.5 up to 5%.
For other exercises, we can use double progression. Again, as long as we can progress only with the set's battery, adding at least one but possibly up to 3 reps or seconds per set and increasing the load accordingly as the rep range is reached would be recommended.
In general, we could say that as long as this simple progression system works, we should continue to run it, and when it starts to fail, that is one of the signs that we are transitioning into the post-novice stage.
In terms of periodization, I would certainly stay away from the more macro changes. However, now that we are doing more exercises, including the accessories and preparation exercises for our goals, I think we can introduce some periodization at the micro-cycle level.
What I would typically advise is to add some variation when it comes to accessories. For example, one day we would do a certain exercise for the biceps and on day 2 we would do a slightly different exercise.
Actionable Step - Post-Novice Phase
At the beginning of the post-novice stage, we can still use the fixed progression methods, such as load progression and double progression. The only caveat is that you need to adjust the rate at which you increase the demands to match the slower overall progression we are experiencing at this stage. So, when it comes to load progression, instead of a linear, we can begin to look at the step pattern.
Alternatively, we can keep the linear pattern but adjust the increments. This brings us to micro-loading. When performing weight exercises, we have the luxury of using microplates, which are available in increments of one kilogram and below. This gives us extreme precision in load selection, which is key in this method when our progression becomes less abrupt.
Calisthenics exercises, where there is no external weight, can be approached with a double progression method. However, we need to modify it in a few ways.
First of all, the idea of a fixed progression pattern can still be applied. We can hold a given prescribed number of reps or seconds at a given load before increasing it.
What can also be done is not to progress sets in a battery, but rather individually. For example, from 3 sets of 6, go to 7,6,6, then 7,7,6, and then 3 sets of 7. This way we slow down the entire progression system.
An athlete in the post novice stage has to take some responsibility for self-regulating some aspects of their training. In the novice phase, we generally just follow a certain progression and things move forward regardless of what we do. When we enter the post-novice phase, and especially if we have been in this phase for a while, bad days or weeks are more common, bad decisions cost us more than they used to, and the training process is generally more nuanced.
For this reason, the further we get in this phase, the more I would recommend switching to the autoregulative progression models, or at least doing some sort of hybrid version where RPE or RIR is tracked meticulously and has some sort of influence on the implied progression.
When it comes to periodization, in general, the further we get into the post-novice stage, the more long-term our thinking should be. The first difference is that at this point I typically start organizing training into mesocycles whereas prior to this, training was just an ongoing process with the same goal in mind.
If our goal is strength, we can start by adding undulation on a weekly, microcycle level so that the rep ranges we work with are different and we start to treat those days as separate when it comes to progression. We can also introduce some exercise changes from mesocycle to mesocycle when it comes to supplementary or accessory exercises.
When we are even further along in this stage, we may need to begin to take a more long-term approach to our training, and begin to organize our training into blocks of a couple of months each, focusing on specific qualities or specific aspects of the goal we are working on. More on that in the next, last step of the article.
Handstand Push Up - Example
So let's set up the progression and periodization for our handstand push-up training.
To start with the progression, I anticipate to see some increase in performance each week (microcycle to microcycle). This means that I need to find some progression models that I can apply to each exercise.
Since the exercises are different from each other, they will require some different strategies.
Personally, I am a fan of the autoregulative approach, which can work very well for those with a good feel for RIR / RPE. I still think that some exercises fit more to the fixed models of progression. So here is how we can go about it:
A) Partial Freestanding Handstand Push Up
- Fixed Double Progression
- [increase 1-2 reps per week until you can do all sets of 3 in a row over 2 sessions, then increase the range of motion and repeat the process]
For exercises that are more technical in nature, I don't like to set autoregulative progression models because they are too sensitive to slight variations in form.
A better way to approach these exercises is to just fight for the reps and judge if they are high quality (we want to make sure we are not pushing over the technical standards).
B) Chest to Wall HSPU
- Fixed Double Progression
- [increase 1-2 reps per week until you can do all sets of 6 in a row over 2 sessions, then add weight vest load and repeat the process]
For this exercise, I decided to use this approach for the same reasons. In this case, load progression with a fixed range of repetitions and micro-loading could work well. But double progression can also work well if we don't have access to small load increments.
C) DB Shoulder Flexion Stretch
- Autoregulative Load Progression
- [increasing the load by 1 magnitude of an available barbell when the hold falls below RPE 8 in terms of discomfort and difficulty]
For flexibility exercises, especially those that we treat more like resistance exercises, I always like to use autoregulative progression because we don't want to push it beyond a certain level of discomfort. This level of discomfort will however vastly differ based on the day.
D) Incline JM Press
- Fixed Load Progression (Step)
- [Increase load by 2.5 KG every two weeks while maintaining rep range]
In this particular example, I think the load progression is justified because we are dealing with a lower percentage of increases.
This would be especially true if we had access to microplates. Since we don't, I decided to spread this progression out and do it in stages (so we increase the weight every two weeks instead of every week).
E) Incline Dumbbell Fly
- Autoregulated Double Progression (Single Set)
- [Increase reps by 1 if the set was below RPE 8 in the last session, if we get 12 reps in a set with below RPE 8, next session we increase the weight by 1 magnitude of an available barbell and go back to 10 reps. This process happens independently for each set]
Incline dumbbell flyes are an exercise that I consider a bit more risky. Also, because they are done with dumbbells, we often don't have the option of small increments and therefore load progression would not work at our stage of development.
The single-set approach allows us to treat each set independently, which may be good for this exercise since we are doing higher rep ranges and the performance between sets may vary significantly.
Once we have the progression model installed in the program, we can also consider some sort of periodization.
The first thing we can include is the idea that our mesocycle will last 6 weeks, and then the next mesocycle will be based on the evaluation of the previous one.
In this program we can certainly apply variation on a micro level:
| Day 1 | Day 2 |
|---|---|
| DB Shoulder Flexion Stretch | Butcher Block |
| Incline JM Press | DB Overhead Extension |
| Incline Dumbbell Fly | Pec Deck |
We can also use variation on a block level for handstand push-up work:
| Mesocycle 1 & 3 | Mesocycle 2 & 4 |
|---|---|
| Partial Freestanding HSPU | Freestanding HSPU Negative |
| Chest-to-Wall HSPU | Z Press |
Once we have Z-Press in the program, we can also experiment with some micro-cycle load undulation, as this exercise allows for fairly incremental load manipulation:
| Z-Press - Day 1 (Load) | Z-Press - Day 2 (Load) |
|---|---|
| 2-3 reps (90%) | 5-6 reps (85%) |
We could also apply linear or step load periodization for Z-Press at the mesocycle level:
| Z-Press - Day 1 (Load) | Z-Press - Day 2 (Load) | |
|---|---|---|
| Week 1 | 80% | 70% |
| Week 2 | 80% | 70% |
| Week 3 | 85% | 75% |
| Week 4 | 85% | 75% |
| Week 5 | 90% | 80% |
| Week 6 | 95% | 85% |
While there are no clear, guaranteed benefits to this approach based on research, we can use this strategy to get used to the exercise when we first learn it.
Keep in mind that this approach doesn’t make it possible for us to use progression on the mesocycle level. This is because we are essentially changing the relative load and rep range we are working with from week to week.
7. Organize Your Training in The Big Picture
Let's Zoom Out
If you've gotten this far and applied the previous steps, congratulations! You've successfully created a training program that, along with a few iterations, will carry you through your calisthenics journey.
What we can add as the icing on the cake, is a big-picture organization of the various elements.
Let's look at your training from a zoomed out perspective and apply some useful strategies that can help you maintain your progress and training satisfaction over the long term.
Deloads
The first thing to consider when taking a more macro view of our training is fatigue management strategies.
As we mentioned earlier, the only real way to increase our recoverability is through proper nutrition and sleep, as well as some lifestyle changes. There is no real cure for training too much.
However, sometimes even with good programming, fatigue can build up and cause problems along the way. This can happen due to both intrinsic and extrinsic training factors. The situation when this happens is called overreaching.
The strategy often used to combat this is called deload. Deload is a period of lower relative training demands, conducted with the goal of allowing the body to recover back to baseline.
There are two primary ways to look at deloading:
- Proactive Deload
- Reactive Deload
As the name suggests, proactive deloading is a lighter training period that we intentionally incorporate into the athlete's program. Reactive deloading, on the other hand, is used only when there is an actual need for it.
My personal approach has certainly evolved over the years. In the early years of coaching, I religiously applied proactive deloading after 4-5 weeks of training mesocycles. It was essentially a linker between the mesocycles.
The good thing about this approach is that for some athletes it suits their mental & emotional profile. Some people enjoy training intensely, and they like to know that there is time in the foreseeable future when they will rest.
There are also problems with the proactive deloading approach. One is practicality (if we have planned a vacation on a week that is not deloaded, we have to bend over backwards to make it logical). The other problem, pointed out by some coaches, is that with this approach we assume that we need to make our training more demanding than we can handle on a regular basis in order to let fatigue subside and reveal adaptations. This idea is called "functional overreaching".
Whether functional overreaching is a valid strategy is not an easy question to answer, as the evidence is mixed. You can read about it more in this article . The point is that it may not be as useful as we may have believed (as fitness professionals).
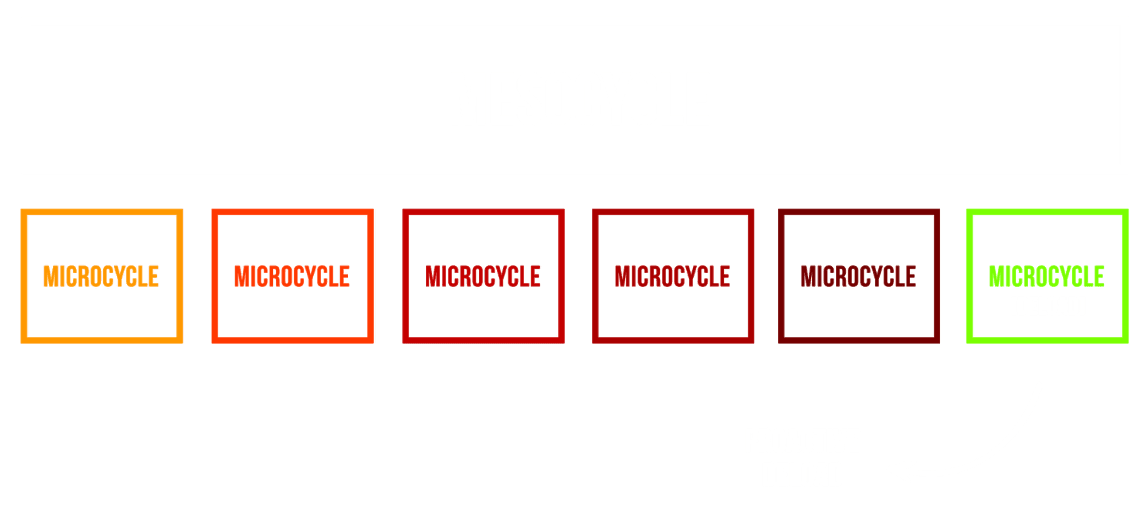
Lately, I've been gravitating more towards a reactive approach. I schedule deloads under the following circumstances:
- Consecutive declines in performance over the last 2-3 sessions
- Connective tissue discomfort
- Loss of motivation and enjoyment of training for more than 2 weeks
- Planned vacation (inability to train)
The question left is, how do you deload? I think this is one of those areas that is often being over-complicated. Essentially, deloading is just allowing our bodies to recover without letting the movement patterns get completely rusty. We could very well do a few days of complete rest instead, and I don't think the difference would be significant. The way I propose to conduct a deload is by:
- Reducing the volume (number of sets) by ~50%
- Decrease proximity to failure by 2 RIR / SIR / RPE points
While not mandatory, it is one of those easy to implement strategies that, granted not overused, can be very helpful at maintaining longevity and not burning ourselves out.
Training Phases
If you've been following some of my work on the FrinksmovementTV YouTube channel in 2019, you know that I used to be big on the idea of block periodization in calisthenics.
Well, while block periodization could technically be applied to Step 6, I think it has a slightly different purpose than short-term variations in training demands.
Block periodization is essentially changing some training variables (along with the exercises themselves) at the macro-cycle (block to block) level. A classic way to do this is through what is used in powerlifting:
- Accumulation Block
- Transmutation Block
- Realization Block
The names sound fancy, but it's really not that complicated. You simply focus first on building muscle and work capacity, then on building strength, and finally on optimizing the amount you can lift in a given exercise.
Macrocycle
Mesocycle
Microcycle
Microcycle
Microcycle
Microcycle
Mesocycle
Microcycle
Microcycle
Microcycle
Microcycle
Mesocycle
Microcycle
Microcycle
Microcycle
Microcycle
Accumulation
[More Volume Oriented]
[Long]
Hypertrophy
[More Volume Oriented]
Macrocycle
Mesocycle
Microcycle
Microcycle
Microcycle
Microcycle
Mesocycle
Microcycle
Microcycle
Microcycle
Microcycle
Mesocycle
Microcycle
Microcycle
Microcycle
Microcycle
Transmutation
[More Intensity Oriented]
[Medium Length]
Strength
[More Intensity Oriented]
Macrocycle
Mesocycle
Microcycle
Microcycle
Microcycle
Microcycle
Mesocycle
Microcycle
Microcycle
Microcycle
Microcycle
Mesocycle
Microcycle
Microcycle
Microcycle
Microcycle
Realisation
[Competition Specific Oriented]
[Short]
Speed/Coordination
[Skill Specific Oriented]
If I'm being completely honest with you, I personally have stopped using this approach. Through years of experimentation, reading the literature, and understanding physiology, I have come to realize that this type of phasic approach is a bit overkill when it comes to non-competition training. Again, this is a nuanced topic for another time.
This is not to say that periodizing from block to block doesn't have its advantages. The way I currently see it is that it is a tool that can allow us to do a number of things:
- Make training more varied and enjoyable
- Optimize for a specific aspect of performance
- Give the connective tissue longer periods of rest from stress
An example of such an approach would be to incorporate more weight training and focus on street lifting in the winter / autumn when we train in the gym anyway. During this time we could also focus on gaining some muscle.
Then, in the summer, we could undergo a cut while switching to more bodyweight training and working more specifically on one arm pull-ups, for example.
We could also switch between the skills we are working on. For 3-4 months we could work on handstand push up, but then put it on low volume maintenance and focus our efforts on another skill like planche. Together, these skills will help us become more versatile calisthenics athletes.
This is not program-hopping. It is a natural variation in training that meets the needs of our bodies and promotes the longevity and sustainability of a program.
Test Yourself
One of the biggest advantages of having a program over not having one is the monitoring and short feedback loop. We know what we are doing day to day, we can go back to it whenever we want, and we can see what the results are.
An additional thing we can use to improve this process is the actual testing sessions.
Every cycle we should dedicate a session or part of it to testing our abilities in a skill we are working on. And, we need to find the right tool to do this. The right tool will:
- Be specific to what we are trying to accomplish
- Be measurable
- Be reproducible
The good news is that if you follow the recommendations in step 3 when choosing the main exercise, this exercise will also have all the characteristics of a good test, as long as it is measurable (which main exercises sometimes are not).
If it is not measurable, then we can look for a substitute that provides the similar specificity but puts some numbers on it.
My recommendation is to always record the test session and keep it to compare with the next session. Sometimes progress can be seen in subtle technical differences rather than numbers.
Based on the test, you will be able to iterate your program more effectively and make changes from mesocycle to mesocycle (such as adjusting your choice of supplemental exercises).
Remember not to change too many things and not to apply too many solutions to the same problem at the same time.
The Next Steps
And so, the time has come, you are now equipped with the knowledge you need to build your calisthenics program and unlock progress towards new skills. Remember, the most important thing right now, after you consumed all this information, is to just start. Just do your best constructing a program, and then run through it. Whether it is your personal program, or your clients program, it doesn’t have to be, and won’t be perfect from the start. It is about creating a starting point and then learning what works best in the process.
It is quite unusual to write internet articles of such volume, but I truly enjoyed writing it and I really hope it does provide you some value and helps you on your way to becoming a better athlete. This process is not easy, but the fact that you decided to take on the challenge of consuming such a massive piece and do it in a hard, non cookie-cutter way is truly admirable.
If you enjoyed this article and want to learn more about calisthenics programming, whether you are a coach or an athlete, we invite you to check out our courses and program. And if you need personal help with your training, consider our online coaching services.